
A car window removal tool is not one universal device. Removing movable side glass usually requires a controlled combination of door-panel tools, clip removers, molding tools, fastener tools, glass-support equipment, and basic hand tools. The correct combination depends on how the glass connects to the regulator, how the belt molding is retained, and whether the door contains wiring, speakers, airbags, or electronic modules.
This guide focuses on side-door glass rather than bonded windshields. It explains how technicians access the inside of the door, support and detach the glass, remove weatherstrips and moldings, and lift the panel through the correct opening. It also shows workshops, distributors, and private-label buyers how to evaluate a car window removal tool kit by function instead of choosing one based only on piece count.
Table of Contents
What Does a Car Window Removal Tool Actually Do?
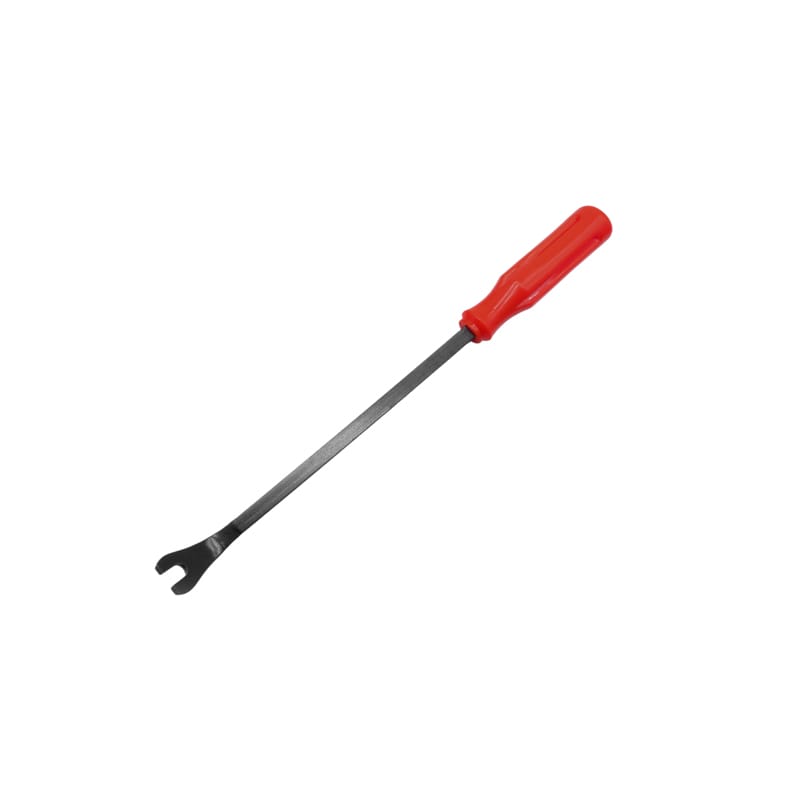
The phrase car window removal tool can describe several tools used at different stages of the same repair. Side glass is normally guided by channels and attached to a regulator or carrier inside the door. Unlike a bonded windshield, it is not usually removed by cutting a continuous urethane bead around the entire panel.
A typical side-window removal job may involve four separate tasks:
- Removing handles, switch panels, screws, covers, and the interior door panel
- Releasing clips, weatherstrip, belt molding, or glass-run channels
- Supporting the glass while disconnecting it from the regulator or carrier
- Tilting and lifting the glass through the correct door opening
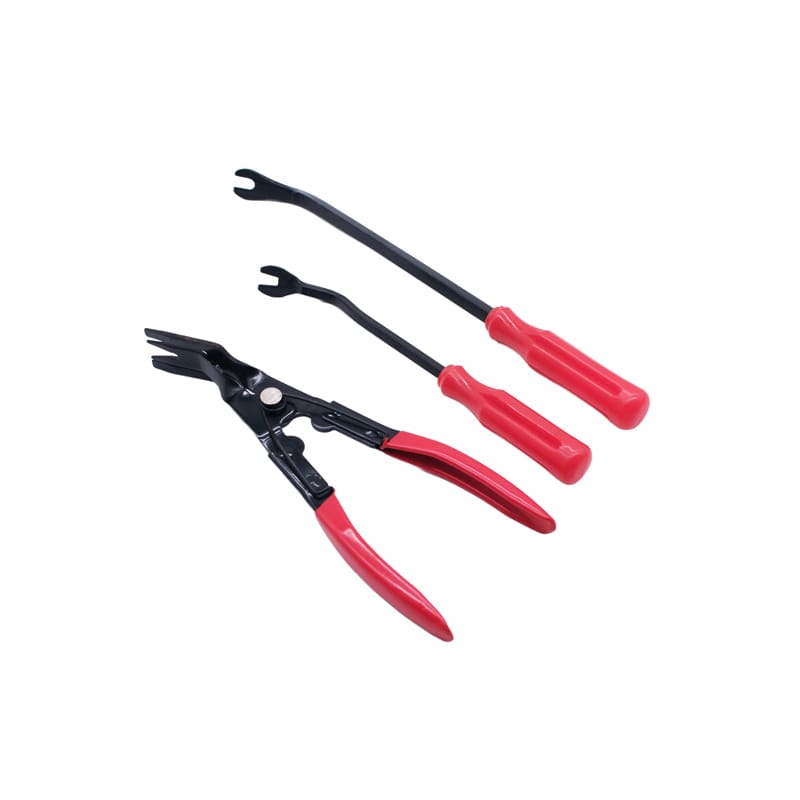
For this reason, the most useful car window removal tool is often a small system rather than a single product. A narrow nylon wedge may create the first access point, a forked remover may release the panel clips, and a molding tool may remove the inner or outer belt molding. A suction handle or temporary support may then control the glass while the mounting fasteners are released.
Technicians should always consult vehicle-specific service information before beginning. Door structure, fastener position, airbag precautions, regulator design, and glass-removal angle differ between models.
Side Door Glass, Fixed Quarter Glass, and Windshields Are Different Jobs
Search results often group every car window removal tool under “auto glass tools,” but the underlying jobs are not identical. Selecting the wrong method can lead to broken trim, scratched paint, damaged glass edges, or unnecessary disassembly.
| Glass Type | How It Is Commonly Retained | Primary Tool Groups |
|---|---|---|
| Movable side-door glass | Connected to a regulator or carrier and guided by channels | Door-panel tools, clip removers, molding tools, basic fastener tools, glass support |
| Fixed quarter glass | Bonded adhesive, gasket, clips, or a combination | Trim access tools, cutting system or gasket tools, protection, glass handling |
| Bonded windshield or back glass | Structural automotive adhesive around the perimeter | Cold knife, wire or cord system, protectors, suction lifters, preparation tools |
| Gasket-mounted glass | Rubber gasket and sometimes a locking strip | Plastic sticks, locking-strip tools, gasket hooks, controlled support |
This article concentrates on movable side-door glass. For bonded panels, use a dedicated windshield or auto glass removal tools guide. A car window removal tool selected for a door panel should not automatically be used to cut bonded glass, and a windshield knife is usually not the main tool for removing movable door glass.
Seven Tool Groups Needed for Side-Glass Removal
A complete car window removal tool kit should cover the full door-access workflow. The exact components vary, but seven functional groups are especially useful.
1. Non-Marring Entry Wedges
Wide and narrow nylon or PP wedges help create a controlled opening around switch panels, covers, bezels, and door trim. A gradual wedge spreads force more evenly than a sharp screwdriver tip. The working edge should be thin enough to enter the panel gap but strong enough to recover after normal flexing.
2. Forked Clip Removers
Forked tools engage around the stem of an upholstery or door-panel clip. Centered engagement helps pull the fastener in its release direction instead of bending the panel around it. The fork opening, tip thickness, and shaft angle should match the intended clip range.
3. Door-Panel and Upholstery Removers
Longer panel removers provide controlled leverage after the first gap has been created. A practical car window removal tool selection may combine plastic tools for visible surfaces with metal fastener tools for resistant clips in concealed areas.
The 4pcs Plastic Auto Car Door Panel Trim Removal Tools Kit includes several remover profiles for interior and exterior trim, upholstery clips, and door-panel access. A broader selection is available in the 27pcs Trim Removal Master Set.
4. Belt Molding and Weatherstrip Tools
Inner and outer belt moldings sit along the lower edge of the window opening. Depending on the vehicle, they may use clips, hooks, screws, or a press-fit design. A narrow molding tool can help release the component without twisting the trim or contacting the glass edge.
The 5pcs Trim Fastener & Molding Removal Tool Kit is intended for window trim, door trim, retaining clips, and molding access. These tasks make it a relevant supporting car window removal tool set for side-glass work.
5. Basic Fastener Tools
Door panels may use screws, bolts, nuts, or specialty fasteners near handles, armrests, speakers, regulators, and glass clamps. Sockets, drivers, extensions, and controlled hand tools must fit the vehicle fasteners accurately. Incorrect size or angle can damage the fastener and delay the job.
6. Glass Support and Handling Equipment
The glass should be supported before its mounting bolts, clamps, or carrier connection are released. Depending on the panel and working method, technicians may use a rated suction handle, a temporary support device, or a second person. The equipment must be suitable for the glass size and condition.
7. Organization and Protection Accessories
Small trays, labels, protective tape, panel covers, an inspection light, and a clean glass stand reduce avoidable mistakes. They may not look like a traditional car window removal tool, but they help prevent lost fasteners, dirty glass, scratched trim, and incorrect reassembly.
How to Choose the Right Tool Material
Material affects surface protection, leverage, durability, and user control. A practical car window removal tool kit often combines plastic and metal components because each solves a different problem.
Nylon and PP Tools
Nylon and PP tools are commonly used around visible interior surfaces, painted trim, switch panels, and decorative moldings. Their lower surface hardness can reduce scratch risk compared with an unprotected steel edge. However, material name alone does not guarantee quality.
Buyers should inspect:
- Tip smoothness and absence of sharp molding burrs
- Edge thickness and consistency
- Flexibility under normal leverage
- Recovery after bending
- Resistance to cracking near thin tips
- Grip texture and handle comfort
Metal Tools
Metal clip removers and fastener tools are useful when clips are aged, deeply seated, or difficult to reach. They offer higher rigidity and more precise engagement, but they require careful positioning around paint, leather, soft-touch coatings, glass, and visible plastic.
A metal car window removal tool should have a smooth finish, symmetrical working tip, stable shaft-to-handle connection, and no sharp burrs outside the intended working edge. Protective wedges can be placed between the tool and the visible surface when additional leverage is required.
Mixed-Material Kits
A mixed kit is usually the most useful workshop option. Plastic wedges provide safe initial access; metal tools handle resistant clips; molding tools address the window opening; and glass-support equipment controls the panel. The goal is not to use the strongest tool first. It is to begin with the lowest-risk option that can complete the task.
Step-by-Step Side Window Removal Workflow
The following workflow is a general framework. Always follow current service information for the specific vehicle, especially where side airbags, electronic modules, frameless glass, anti-pinch systems, or calibration procedures are involved.
1. Confirm the Repair Scope
Identify whether the glass will be replaced, reused, adjusted, or removed to access another component. Confirm whether the problem involves the glass, regulator, carrier, guide channel, weatherstrip, latch, wiring, or door structure. This determines which car window removal tool groups are required.
2. Inspect and Document the Door
Record existing scratches, cracked trim, loose molding, broken clips, damaged glass, and previous repairs. Operate the window when safe to determine whether it moves, binds, tilts, or makes abnormal noise. A non-operating window may require manual positioning before the mounting fasteners can be reached.
3. Follow Electrical and Restraint-System Precautions
Modern doors may contain side-impact sensors, side airbags, speakers, switches, wiring, and control modules. Follow the vehicle manufacturer’s procedure for power isolation, waiting periods, connector handling, and component storage. Do not probe unfamiliar connectors or place tools in an airbag deployment path.
4. Remove Covers, Switches, and Visible Fasteners
Use a thin non-marring wedge to lift covers and switch bezels at approved entry points. Disconnect electrical connectors by releasing their locks rather than pulling the wires. Store screws and covers in a labeled sequence.
5. Release the Door-Panel Clips
Begin at a service-approved edge. Create a small gap with a plastic wedge, locate the clip, and place the forked remover near its center. Apply controlled force in the clip’s release direction. Work around the panel instead of pulling one corner until the entire panel bends.
The clip remover tools guide provides additional information about tool profiles, flexibility, edge design, and controlled panel separation.
6. Lift and Support the Door Panel
Some panels must be lifted upward after the clips release because the top edge hooks over the door structure. Support the panel while disconnecting handle cables, speakers, lamps, and remaining wiring. Place it on a protected surface.
7. Open the Moisture Barrier Carefully
The moisture barrier helps prevent water entering the cabin. Peel it back only as much as required and avoid tearing it. Use controlled plastic tools around adhesive-sensitive areas. The barrier should be resealed according to the service procedure during reassembly.
8. Position and Support the Glass
Move the glass until its mounting bolts, clamps, or carrier connections align with the service openings. Support the panel before loosening anything. A suitable car window removal tool setup keeps the glass stable without concentrating pressure on one edge.
9. Disconnect the Glass From the Regulator or Carrier
Loosen or remove the specified fasteners while maintaining support. Some designs use clamps; others use tabs, bonded retainers, or carrier plates. Do not pry directly against the glass unless the vehicle procedure specifies a protected method.
10. Remove Belt Molding or Guide Components as Required
Release the inner or outer belt molding, run channel, mirror trim, or guide only when necessary. Identify how each part is retained before applying force. A narrow molding car window removal tool can be useful, but the edge must stay away from the glass and painted door skin.
11. Tilt and Lift the Glass Through the Correct Opening
The glass may need to rotate or tilt at a specific angle. Lift slowly, monitor both edges, and stop if the panel contacts a guide, frame, mirror mount, or remaining molding. Do not twist the panel aggressively to overcome an obstruction.
12. Inspect the Removed Glass and Door Components
Check the glass edge, mounting holes or bonded retainers, regulator, channels, clamps, clips, and weatherstrips. Place reusable glass on a clean, stable stand with edge protection. Keep hardware organized for reinstallation.
Common Mistakes That Damage Door Panels or Glass
Using a Screwdriver as the First Pry Tool
A screwdriver places force on a narrow metal edge. On visible trim, this can create dents, scratches, or white stress marks. Use a purpose-designed non-marring car window removal tool first when the surface and access point permit it.
Pulling the Panel Before Finding the Clip
Pulling on the panel edge can bend the substrate or tear the clip mount. Create a small gap, locate the fastener, and release it close to the center.
Releasing the Glass Without Support
Once clamps or mounting bolts are loosened, the glass may drop into the door or tilt against a sharp metal edge. Support must be established before disconnection.
Forcing the Glass Through the Wrong Angle
If the panel does not lift freely, another molding, guide, fastener, or bracket may still obstruct it. Stop and inspect instead of twisting the glass.
Mixing Different Fasteners
Door screws and clips may look similar but have different lengths, shoulders, or positions. Incorrect installation can damage wiring, prevent the panel from seating, or contact the glass.
Ignoring Moisture-Barrier Sealing
A poorly resealed barrier can contribute to water entering the cabin or damaging interior components. Removal and reinstallation are part of the repair quality.
Failing to Test Before Final Assembly
Operate the glass, switches, locks, speakers, handles, and related functions before installing every cover and fastener. Correcting a problem is faster while the access points remain open.
Safety and Ergonomics for Repetitive Door Work
Side-glass service combines sharp glass edges, confined hand positions, repetitive panel removal, awkward pulling angles, and electrical components. A well-designed car window removal tool should help technicians work with less unnecessary force and better control. The selected car window removal tool should fit the clip, surface, and working angle rather than relying on excessive force.
The U.S. National Institute for Occupational Safety and Health explains that non-powered hand tools should be selected to reduce excessive force, repeated movement, and awkward body positioning. Its guide to selecting non-powered hand tools recommends evaluating the job, work space, posture, and tool design.
Useful practices include:
- Use eye protection when glass particles or fastener debris may be present
- Use suitable hand protection while handling damaged or sharp-edged glass
- Keep wrists as neutral as the working area permits
- Choose handles that can be controlled without excessive pinch force
- Support the panel instead of holding its full weight with one hand
- Use lighting to locate clips and fasteners before applying force
- Replace cracked plastic tools, bent forks, and loose handles
- Keep sharp and delicate tools separated in storage
The OSHA hand and power tool guidance also emphasizes proper tool condition and safe use. A damaged car window removal tool should be removed from service rather than used for one more job.
Where replacement glazing is involved, the National Highway Traffic Safety Administration’s glazing guidance explains that federal glazing requirements apply to motor-vehicle and aftermarket replacement glazing. The Automotive Glass Replacement Safety Standard also provides industry best-practice guidance for replacement work.
Quality Checklist for Distributors and OEM Buyers
B2B buyers should evaluate a car window removal tool kit under real working conditions. Product photos cannot show tip recovery, clip engagement, handle movement, or batch consistency.
| Inspection Area | What to Check | Why It Matters |
|---|---|---|
| Plastic working edges | Smooth finish, no burrs, consistent thickness | Reduces surface marking and uneven entry |
| Flexibility | Controlled bending and recovery | Supports leverage without permanent deformation |
| Fork geometry | Symmetry, opening width, tip thickness | Improves centered clip engagement |
| Metal finish | No unwanted sharp edges, corrosion protection, straight shaft | Improves safety and durability |
| Handle connection | No looseness, rotation, cracking, or exposed edges | Maintains control under load |
| Tool variety | Each shape has a clear purpose | Avoids inflated piece counts with repeated profiles |
| Storage | Tool retention, labels, edge protection | Reduces missing and damaged tools |
| Instructions | Clear applications, warnings, and component identification | Reduces misuse and support questions |
| Batch consistency | Dimensions, color, flexibility, assembly | Supports repeat orders and stable performance |
Sample testing should include door-panel entry, clip release, molding access, repeated flexing, handle load, and storage checks. A useful car window removal tool kit should perform consistently as a system, not only pass an appearance inspection.
OEM Customization That Adds Real Value
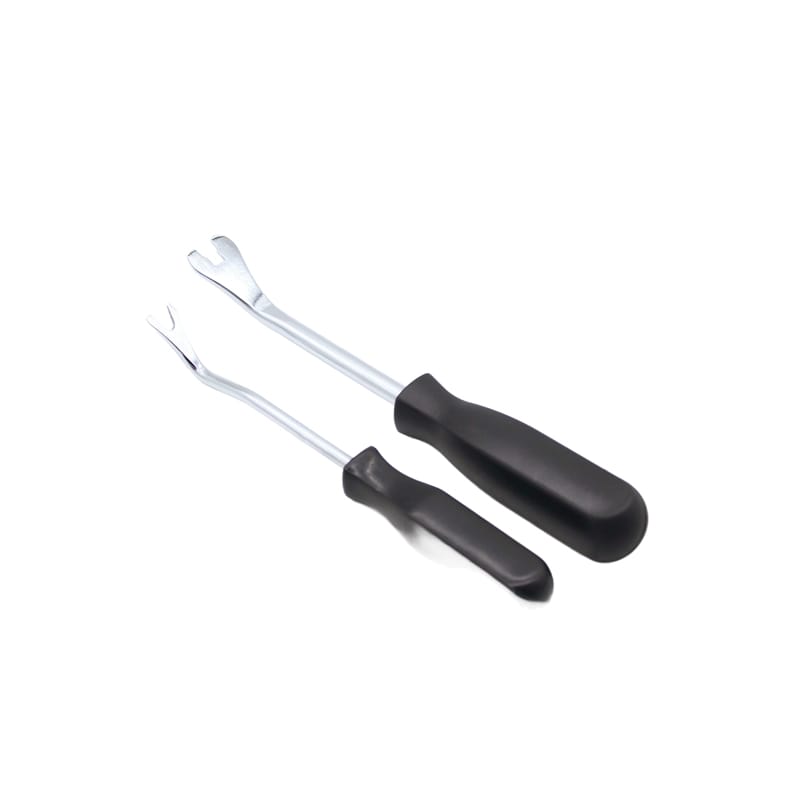
Color and logo are useful, but meaningful customization begins with the intended workflow. When developing an OEM car window removal tool kit, specify: Each car window removal tool in an OEM set should have a defined task, material specification, and inspection standard.
- Target users and main vehicle applications
- Plastic, metal, or mixed tool structure
- Required tip shapes and edge thicknesses
- Tool count and functional purpose of each piece
- Handle texture and preferred grip dimensions
- Storage pouch, tray, or case
- Instructions, warnings, and languages
- Logo method and position
- Barcode, labels, and retail packaging
- Sample approval and batch-inspection criteria
A private-label kit should also explain what it does not include. If glass suction equipment, sockets, or vehicle-specific fasteners are separate, the packaging and product page should say so. Clear scope improves customer expectations and reduces returns.
For custom tool combinations, wholesale supply, packaging, or OEM development, buyers can contact Fengjie Tools with their target market and required applications.
FAQ
What is the best car window removal tool for side door glass?
The best car window removal tool is usually a combination of non-marring door-panel wedges, clip removers, molding tools, accurate fastener tools, and suitable glass support. Vehicle construction determines the exact combination.
Can a windshield removal knife remove side door glass?
Usually not. Movable side glass is commonly connected to a regulator or carrier rather than bonded around its full perimeter. Door-panel access and regulator disconnection are normally more important than adhesive cutting.
Do I need to remove the door panel first?
In many vehicles, yes. The panel must be removed to access the glass mounting points, regulator, guide channels, and wiring. Follow vehicle-specific procedures because fastener positions and panel-release directions differ.
Are plastic tools safer than metal tools?
Plastic tools are often preferred around visible and delicate surfaces. Metal tools provide stronger and more precise clip engagement. A mixed car window removal tool kit gives workshops the widest coverage.
How do I avoid breaking door-panel clips?
Locate the clip before pulling, engage near its center, and apply force in the release direction. Replace aged or damaged clips instead of forcing them back into service.
How should the glass be supported?
Support the glass before releasing clamps or fasteners. Use a suitable suction device, support system, or second person according to the panel size, condition, and service procedure.
Can one kit fit every vehicle?
No single set covers every fastener, molding, glass shape, or door design. A professional car window removal tool range should include different profiles and be used with vehicle-specific information.
What should distributors inspect before bulk ordering?
Inspect working-edge finish, flexibility, fork geometry, handle connection, metal finishing, tool variety, storage, instructions, and sample-to-batch consistency.
Conclusion
A car window removal tool should be selected according to the complete side-glass workflow, not treated as one universal cutter. The technician must gain controlled access to the door, release clips and molding, support the glass, disconnect it from the regulator or carrier, and lift it without contacting the body or damaging the edge. A well-matched car window removal tool reduces avoidable force at every stage of the job.
For workshops, the most useful kit combines non-marring entry tools, clip removers, molding tools, accurate fastener tools, glass support, protection, and organization. For distributors and OEM buyers, product quality depends on edge geometry, material behavior, handle control, functional variety, and repeat-production consistency.
Explore the site’s car body and interior tools, compare relevant trim and molding sets, or send an inquiry for a customized car window removal tool program for wholesale, workshop supply, or private-label distribution.