
A trim fastener removal tool looks simple until a technician has to work around painted trim, brittle door panels, hidden push clips, tight molding, and several different fastener sizes on the same vehicle. The wrong tool can remove the clip and still damage the panel. The right trim fastener removal tool puts force close to the retainer, uses a working edge that fits the available gap, and gives the user enough leverage without turning the trim itself into the lever.
For workshops, installers, body technicians, and automotive tool buyers, this matters because trim removal is repeated across door, window, dashboard, upholstery, molding, and interior-access jobs. A practical trim fastener removal tool should therefore be selected by fastener geometry and working conditions rather than by appearance or piece count alone.
This guide explains the main automotive fasteners, how different remover profiles work, when nylon or metal tools make sense, how to reduce broken clips, and what distributors and private-label buyers should inspect before approving a tool or multi-piece set.
Table of Contents
What Is a Trim Fastener Removal Tool?
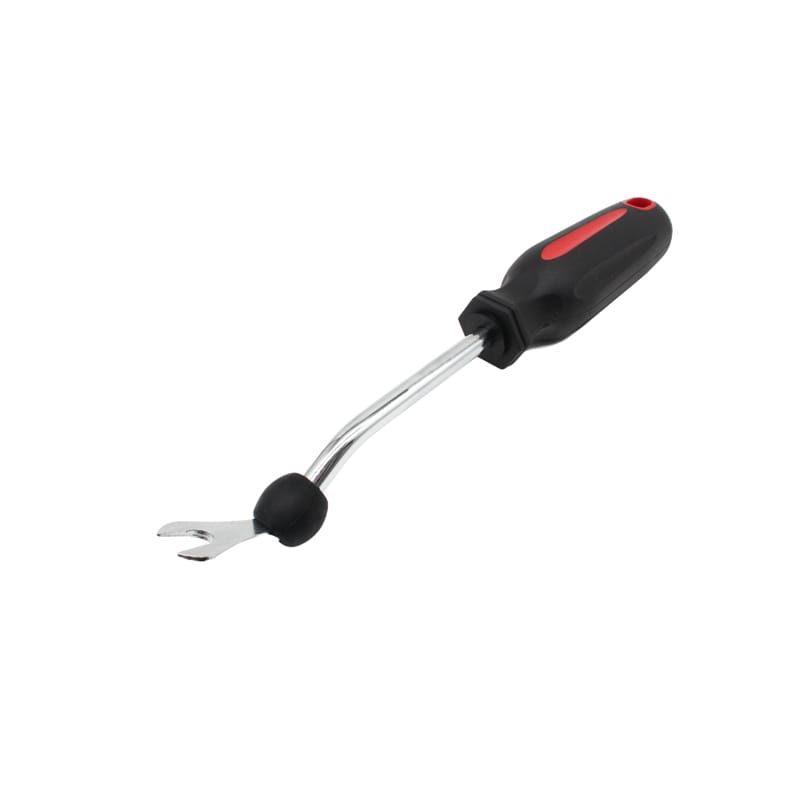
A trim fastener removal tool is a hand tool designed to release clips, retainers, molding fasteners, upholstery anchors, panel clips, and similar automotive hardware while limiting unnecessary stress on the surrounding trim.
Common designs include:
- Forked nylon pry tools
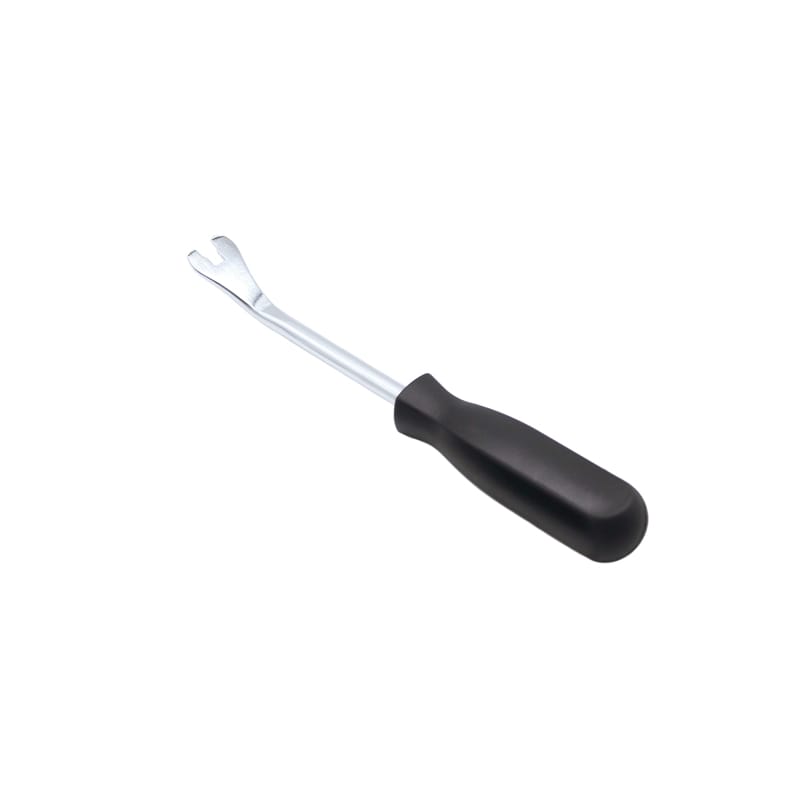
- V-notched metal removers
- Wide panel wedges
- Narrow entry tools
- Pull-type removers
- Offset or angled removers
- Spring-loaded clip pliers
The working principle is different from using a screwdriver. A screwdriver often contacts a panel several centimeters away from the actual fastener. A trim fastener removal tool is intended to move closer to the clip stem or retention point, reducing the amount of panel bending required to release it.
Fengjie’s 5pcs Trim Fastener & Molding Removal Tool Kit is made from nylon/PP and is intended for window trim, door trim, retaining clips, and windshield molding access. The different profiles allow the user to choose a shape rather than force one edge into every location.
Why Automotive Fasteners Need More Than One Tool Shape
Vehicle trim is not retained by one universal clip. Even within a single door, a technician may encounter screws, push clips, molded hooks, sliding tabs, metal spring clips, and decorative covers before the main panel can be removed.
A trim fastener removal tool works only when the user understands what is holding the component.
Push-In Panel Clips
These are common around door cards, cargo trim, kick panels, and interior liners. A forked trim fastener removal tool can move close to the stem and apply force more evenly than pulling the panel by hand.
Fir-Tree or Christmas-Tree Fasteners
These use multiple ribs along the stem. They may require progressive extraction because several ribs remain engaged as the clip moves outward.
Trying to release them with one sharp pull can damage the ribs or the mounting point in the panel.
Two-Piece Push Rivets
These fasteners often have a center pin that expands or locks the outer body. Trying to pry the entire fastener before releasing the center can damage the rivet or surrounding panel.
Before applying leverage, identify whether the center must first be lifted, pressed, or otherwise released according to the fastener design.
Metal Spring Clips
Metal clips can hold decorative trim, molding, or interior panels with higher local retention force. A plastic trim fastener removal tool may be useful for initial access, but a stronger metal profile may be required for final release.
Hooks and Sliding Retainers
These are important because they may not be designed to pry outward at all.
A panel can have several push clips along the bottom and hooks along the top. The clips release outward, but the panel may then need to move upward or sideways.
The lesson is simple: identify the retention system before increasing leverage.
Fork Width Is One of the Most Important Selection Factors
The fork or notch determines how closely a trim fastener removal tool can engage the clip stem.
If the opening is too narrow, the tool may stop against the stem before the working surfaces reach the best leverage point. If it is too wide, the remover may contact the panel instead of supporting the clip.
A useful kit should therefore provide different fork widths or tool profiles.
When comparing fork geometry, look at:
- Opening width
- Slot depth
- Inner-edge finish
- Tip thickness
- Symmetry
- Taper
- Working-head angle
For a workshop, these details determine whether the trim fastener removal tool can reach several common clip sizes.
For a distributor, dimensional consistency determines whether the same SKU performs the same way from one production batch to the next.
The objective is not to squeeze the clip stem tightly. The objective is to get close enough to the fastener that removal force is transferred into the retainer rather than the panel backing.
A fork that is slightly wider than one clip may still work correctly if the contact surfaces remain close to the fastener. What matters is controlled engagement rather than an exact friction fit.
Nylon, PP, or Steel: Which Trim Fastener Removal Tool Material Is Better?
Material should match the surface and the load.
Nylon and PP Tools
A nylon or PP trim fastener removal tool is useful where surface protection is a priority. Typical applications include:
- Door panels
- Dashboard trim
- Window molding
- Decorative covers
- Audio bezels
- Soft interior panels
Plastic tools reduce direct metal-to-surface contact and can provide controlled flex. This makes them useful for creating the first gap before the fastener is fully visible.
The 4pcs Plastic Auto Car Door Panel Trim Removal Tools Kit Set includes wide, narrow, pull-type, and upholstery-removal functions for interior and exterior trim work.
Not all plastic tools behave in the same way. Tip thickness, polymer grade, molding conditions, tool length, and cross-section all influence stiffness and recovery.
A tool that is too soft may bend before the clip moves. A tool that is too brittle can crack during normal leverage.
Steel Tools
A metal trim fastener removal tool can provide greater stiffness for clips that are tightly seated or located deeper behind a panel.
Steel tools are useful when:
- The fastener requires higher extraction force
- A thin but rigid working tip is needed
- The clip is difficult to reach with a flexible plastic tool
- Repeated workshop use demands stronger load resistance
However, the surrounding surface must be protected. A metal remover with an unfinished edge can damage paint, plastic, vinyl, or coated trim.
The Best Workshop Approach
Professional technicians often use both.
Start with a plastic trim fastener removal tool where the surface is sensitive. Create a controlled opening, identify the fastener, and change to a metal remover only when greater strength is actually needed.
That is more effective than forcing a steel tool into every seam or bending a nylon tool beyond its intended working load.
How to Use a Trim Fastener Removal Tool Without Breaking Clips
The correct process begins before the tool touches the panel.
Inspect the Component
Look for:
- Visible screws
- Screw covers
- Switch bezels
- Grab handles
- Hidden caps
- Sliding trim
- Upper hooks
- Electrical connectors
- Different clip locations
If the panel remains rigid after one area has been released, stop and look for another retention point.
Do not assume that additional resistance means the fastener simply needs more force.
Create a Small Access Gap
Use a narrow, non-marring tool where appropriate.
Do not attempt to remove the entire panel at this stage. Open only enough space to locate the first clip or determine the retention direction.
A work light can make a major difference because the technician can see whether the panel is held by a push clip, screw, hook, or another attachment.
Move the Tool Toward the Fastener
Once the clip is located, reposition the trim fastener removal tool as close as possible to the stem.
If the panel bends significantly while the clip does not move, the working point is probably too far away.
This is one of the most important practical differences between controlled clip removal and simply pulling the trim by hand.
Seat the Fork Correctly
The tool should straddle or support the fastener as evenly as the design allows.
Avoid loading only one edge of the clip head. Uneven contact can twist the fastener rather than extract it.
If the fork cannot seat properly, change tools instead of forcing an incompatible slot over the clip.
Apply Progressive Leverage
Use steady pressure instead of a sharp snap.
Progressive force lets the technician feel whether:
- The clip is moving
- The tool is slipping
- The panel is bending
- The fastener is different from expected
A trim fastener removal tool improves control only when the user responds to that feedback.
If resistance suddenly increases, stop and inspect rather than applying additional force automatically.
Support the Panel
As clips release, the panel becomes less stable.
Support it so the remaining fasteners, wires, speaker connectors, or latch cables do not carry the full load.
Inspect Each Retainer
A clip that comes out in one piece can still be distorted.
Check the stem, locking ribs, head, mounting fit, and any sealing features before reuse.
Damaged clips should be replaced rather than reinstalled simply because they have not completely broken.
Door Panel Work: Where a Trim Fastener Removal Tool Adds the Most Value
Door panels combine delicate surfaces with multiple hidden attachment points, making them one of the most common applications for a trim fastener removal tool.
A typical sequence may involve:
- Removing a switch bezel or small cover
- Removing screws around the handle or armrest
- Creating a small gap along the lower panel edge
- Locating the first push clip
- Engaging it with a forked remover
- Working around the perimeter one fastener at a time
- Lifting or sliding the panel according to its upper retention method
- Disconnecting wiring and latch cables
The exact procedure varies by vehicle, so vehicle-specific service information should always take priority.
Fengjie’s 6 PCS Trim & Upholstery Set combines five nylon trim and upholstery tools with spring-loaded clip removal pliers.
That type of mixed kit is useful because door-panel work often needs both initial plastic access and stronger fastener extraction.
A trim fastener removal tool is particularly valuable at the perimeter clips. Instead of pulling the middle of the door card, the technician can move the working end closer to each clip and reduce the bending load on the panel backing.
Once the final perimeter fastener releases, do not assume the panel should be pulled directly away from the door.
Many door panels use upper hooks or a lip near the window line. Confirm the final movement before lifting the panel away.
Window Trim and Molding Removal
Window and door molding can involve painted bodywork, rubber seals, thin decorative trim, plastic fasteners, and metal retainers in a very small area.
A trim fastener removal tool should therefore be chosen for both access and surface protection.
For window trim work:
- Identify whether the molding is clipped, hooked, taped, or integrated with weatherstripping.
- Start with a thin plastic profile where the surface is visible.
- Avoid levering directly against paint or exposed glass edges.
- Move along the molding gradually instead of lifting one end aggressively.
- Switch to a stronger remover only if the fastener requires it.
- Store reusable clips so they can be inspected before installation.
The 5pcs Trim Fastener & Molding Removal Tool Kit is especially relevant here because the product is intended for window trim, door trim, retaining clips, and windshield molding release.
The same trim fastener removal tool should not automatically be used on every molding.
A wide plastic wedge and a narrow fork solve different access problems. The tool should follow the retention design rather than forcing the molding to move in a convenient direction.
Eight Mistakes That Turn a Simple Fastener Job Into Panel Damage
1. Starting With Maximum Force
More force is not the same as better engagement.
If the remover is not positioned close to the clip, additional leverage usually bends the panel first.
2. Using a Screwdriver as the Default Trim Tool
A screwdriver concentrates pressure into a narrow steel edge.
It may work, but it increases the chance of visible marks and damaged clip mounts.
3. Ignoring Hidden Screws
A trim fastener removal tool cannot release a panel that is still mechanically secured by a screw behind a handle or switch bezel.
4. Using One Fork Size for Every Clip
Different fasteners need different slot widths and working angles.
A tool that fits one clip well may twist another.
5. Prying Too Far From the Fastener
If the panel bends dramatically, move the trim fastener removal tool closer to the retention point.
6. Forcing a Plastic Tool That Is Already Over-Flexing
A nylon tool is useful for surface-sensitive access, but extreme flex is a signal to stop and choose a stronger profile.
7. Reusing Damaged Clips
A cracked or permanently deformed retainer can create rattles or a loose panel after reassembly.
8. Assuming “Non-Marring” Means Damage Is Impossible
Dirt trapped between the tool and trim, a damaged working edge, or excessive leverage can still create scratches.
The material reduces risk; technique still matters.
What B2B Buyers Should Inspect Before Ordering
For importers, distributors, and private-label brands, a trim fastener removal tool should be evaluated as a functional component, not only as a retail accessory.
Material Specification
Ask the supplier to identify the material accurately.
For plastic tools, that may include:
- Nylon
- PP
- Reinforced nylon
- Another specified polymer
For metal tools, confirm the steel type and relevant treatment rather than relying only on descriptions such as “high strength.”
Working-Edge Finish
Inspect:
- Burrs
- Sharp flash
- Uneven molding lines
- Rough metal edges
- Warped forks
- Inconsistent slot widths
The working end directly contacts clips and trim.
Poor finishing can cancel out the benefit of a specialized trim fastener removal tool.
Dimensional Consistency
Measure several samples from the same batch.
Useful dimensions include:
- Fork opening
- Tip thickness
- Slot depth
- Working angle
- Tool length
- Handle dimensions
Consistency matters for repeat orders because customers expect a replacement tool to fit the same applications as the previous batch.
Flex and Recovery
For plastic tools, apply representative load and check whether the tool returns close to its original shape.
A trim fastener removal tool that bends permanently after normal leverage will quickly become difficult to use accurately.
Handle and Assembly Quality
For multi-material tools, inspect how the handle is fixed to the shaft.
Check for:
- Loose grips
- Rotation
- Gaps
- Poor surface transitions
- Uncomfortable pressure points
Packaging Logic
A kit should explain what the different tools do.
Instead of marketing only the piece count, show the intended functions:
- Narrow entry
- Wide panel separation
- Forked clip removal
- Molding access
- Long-reach fastener removal
- Pull-type extraction
That makes the product easier to understand for both retail customers and professional buyers.
A Practical Sample Test Plan for Trim Fastener Removal Tools
Before approving a bulk order, test the tools on representative fasteners and panels.
| Test Area | What to Check | Why It Matters |
|---|---|---|
| Gap entry | Can the tip enter common trim seams? | Determines real access |
| Clip engagement | Does the fork fit several fastener stems? | Reduces slipping |
| Surface contact | Does the working edge remain smooth? | Supports damage control |
| Flex recovery | Does the plastic return after leverage? | Indicates functional durability |
| Metal rigidity | Does the shaft stay aligned under normal load? | Supports precise extraction |
| Handle security | Does the grip remain fixed? | Improves control |
| Repeated cycles | Does performance remain stable? | Reflects workshop use |
| Batch dimensions | Are several samples consistent? | Supports repeat orders |
OSHA’s Hand and Power Tools guidance emphasizes maintaining hand tools in safe condition.
For workshops, that means damaged removers should be taken out of service rather than continuing to use cracked plastic tools or bent metal tips.
A bulk buyer can use a similar principle during sample approval: a tool should be evaluated after repeated representative use, not only while it is new.
How to Build a Better Multi-Piece Kit
A useful kit should cover several jobs with minimal duplication.
A logical configuration could include:
- Thin narrow pry tool
- Medium flat wedge
- Wide panel remover
- Small forked trim fastener removal tool
- Larger forked remover
- Angled molding tool
- Long-reach clip remover
- Metal clip remover or spring-loaded pliers
The goal is functional coverage.
A 20-piece package filled with nearly identical shapes may be less useful than an eight-piece set in which every trim fastener removal tool solves a different problem.
For distributors, this creates clear product tiers.
Entry-Level Kit
Focus on basic plastic profiles for door panels and interior trim.
The set should be easy to understand and contain enough shape variety to handle common interior jobs.
Professional Interior Kit
Add several fork sizes, long-reach tools, and clip pliers.
Professional users generally benefit from more specific working profiles rather than simple duplication.
Door and Window Service Kit
Emphasize window molding, door-panel access, fastener extraction, and non-marring working edges.
This configuration is especially relevant to workshops that regularly need access behind door panels or around glass and window trim.
Workshop Master Kit
Combine plastic access tools, dedicated metal removers, pliers, storage, and clear identification.
Fengjie’s Car Body and Interior Tools category provides several products that can support these different kit structures.
OEM and Private-Label Development
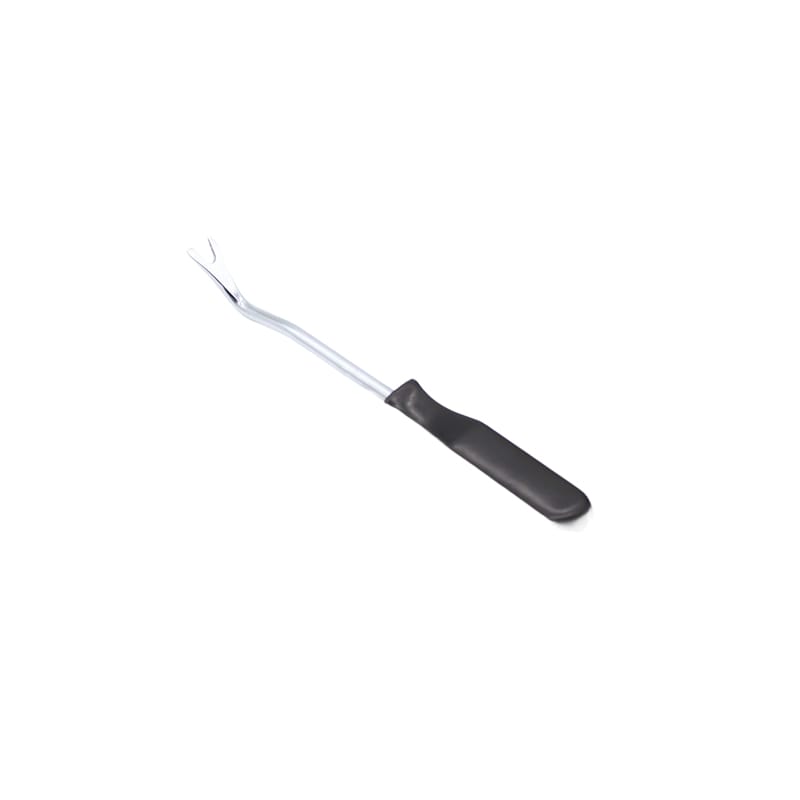
A trim fastener removal tool is well suited to private-label programs because buyers can differentiate the product through tool combinations, material choices, color, packaging, instructions, and storage.
Before mass production, define:
- Target user
- Main clip applications
- Material specification
- Fork widths
- Tool lengths
- Working angles
- Required kit profiles
- Color
- Logo location
- Storage format
- Retail packaging
- Instruction language
- Barcode and label requirements
- Sample inspection criteria
For a B2B project, it is better to specify the intended application than to request a generic “professional trim kit.”
For example:
“We need a door and window trim kit for workshops, including narrow non-marring entry tools, two fastener fork sizes, a wide door-panel tool, and one stronger metal remover.”
That gives the supplier a clearer basis for configuring each trim fastener removal tool around an actual use case.
It also makes sample approval easier because the buyer can test every tool against a defined function rather than deciding whether the overall kit simply “looks complete.”
FAQ
What is a trim fastener removal tool used for?
A trim fastener removal tool is used to release automotive clips, retainers, molding fasteners, upholstery clips, door-panel fasteners, and related trim hardware while reducing unnecessary stress on the surrounding panel.
Is a trim fastener removal tool better than a screwdriver?
For automotive trim work, it usually offers better control because the working end is designed to engage clips and panel gaps.
Plastic versions also reduce direct metal contact with visible surfaces.
Are plastic fastener removal tools strong enough?
They are suitable for many common interior clips and trim applications.
Very tight, deep, or metal fasteners may require a stronger steel remover or clip pliers.
How do I choose the correct fork size?
Choose a fork that can move around or close to the clip stem without excessive side pressure.
The tool should support the fastener instead of pressing mainly against the panel.
Can the same trim fastener removal tool be used on door and window trim?
Some profiles can work in both areas, but door panels, window molding, and upholstery fasteners can use different clip sizes and access angles.
A multi-profile kit is usually more practical.
Why do trim clips break during removal?
Common causes include incorrect release direction, brittle plastic, prying too far from the clip, hidden screws, poorly fitting tools, and sudden excessive force.
What should distributors inspect before buying in bulk?
Check material specification, working-edge finish, fork dimensions, flexibility or shaft rigidity, handle retention, repeated-use performance, batch consistency, packaging, and the logic of the overall kit.
Can trim fastener removal tools be customized?
Depending on manufacturing capability, OEM options may include tool color, logo, kit combinations, packaging, storage cases, labels, barcodes, and instruction materials.
Is a higher piece count always better?
No.
Functional variety is more important. Each trim fastener removal tool should have a distinct purpose, size, reach, or working angle rather than duplicating tools already in the set.
Conclusion
The best trim fastener removal tool is not simply the hardest or longest remover in the toolbox. It is the one that fits the clip, reaches the correct retention point, provides enough leverage, and controls contact with the surrounding panel.
For technicians, that means identifying the fastener before prying, choosing the correct fork size, using plastic tools where surface protection matters, and moving to stronger metal profiles only when the application requires them.
For workshops, a well-designed multi-piece set reduces improvised screwdriver use and gives technicians several controlled options for door panels, window trim, molding, upholstery, and interior fasteners.
For distributors and private-label buyers, material accuracy, fork geometry, edge finish, flex recovery, dimensional consistency, ergonomics, and repeat-production quality are more important than vague “heavy-duty” claims or inflated piece counts.
Fengjie’s 5pcs Trim Fastener & Molding Removal Tool Kit directly supports window trim, door trim, retaining-clip, and molding work.
Buyers can also explore related Car Body and Interior Tools or contact Fengjie Tools to discuss wholesale, OEM, private-label packaging, and custom trim fastener removal tool sets.