
Table of Contents
An adjustable basin wrench reaches upward behind a sink to turn a faucet's mounting nut. Its long shaft keeps your hand below the cramped area, while the pivoting jaw grips a nut that an ordinary wrench may struggle to reach. Turn the jaw to the appropriate side for loosening or tightening, seat it on the nut and apply controlled force through the lower handle.
Before buying one, look at the fitting. Some faucets use a large plastic retaining nut, a bracket with small nuts, or a proprietary installation tool. A basin wrench is useful for many traditional mounting nuts, but it is not the answer to every fastening hidden under a sink. Identifying the nut is the first step to avoiding an awkward half-hour of turning the wrong thing.
Make room to see what you are doing
Empty the cabinet and place a towel or a shallow container underneath the work. Use a light that can stand on its own so one hand is not occupied holding a torch. Look upward from more than one angle. A phone photograph can help you see the fastener before you try to reach it.
If the task involves disconnecting the faucet or water connections, turn off the appropriate supplies and confirm that the water has stopped before opening a connection. Do not assume a valve is closed merely because its handle has reached the end of its movement. Follow the faucet instructions for disconnecting hoses and fittings, and be prepared for water remaining in the lines.
Avoid dismantling nearby plumbing just because it is in the way unless you know how it will be refitted. Moving a drain trap can create working room, but it also creates another joint to seal and check. Sometimes changing your body position, moving the light or extending the wrench gives enough access without disturbing anything else.
Find the mounting nut, not the water connection
The faucet mounting nut usually secures the faucet's threaded shank or mounting arrangement to the sink or countertop. A supply connection joins the water line to the faucet. They may be close together, but they do different jobs. Turning a supply fitting will not release the faucet's mounting hardware and may twist a hose if it is not supported correctly.
This is a good moment to decide whether the basin wrench can actually grip the nut. Teeth need a suitable outside surface to contact. A large winged plastic nut may be better served by the faucet's supplied tool or another suitable wrench. Trying to clamp the edge of a plastic wing with the wrong jaw can break the very feature needed for removal.
Set the jaw direction before working overhead
The pivoting head changes the direction in which the jaw bites. Hold the wrench where you can see it and test the direction gently on a suitable loose nut if necessary. Under turning force, the jaw should close onto the nut rather than opening and slipping away. Reverse the head when you need to turn the other way.
On a conventional right-hand thread, loosening is counterclockwise when viewed directly at the nut from the end you are turning. Under a sink, your viewpoint can make that direction feel reversed. Pause and picture the thread instead of continuing because “left” seems obvious from where your arm happens to be.
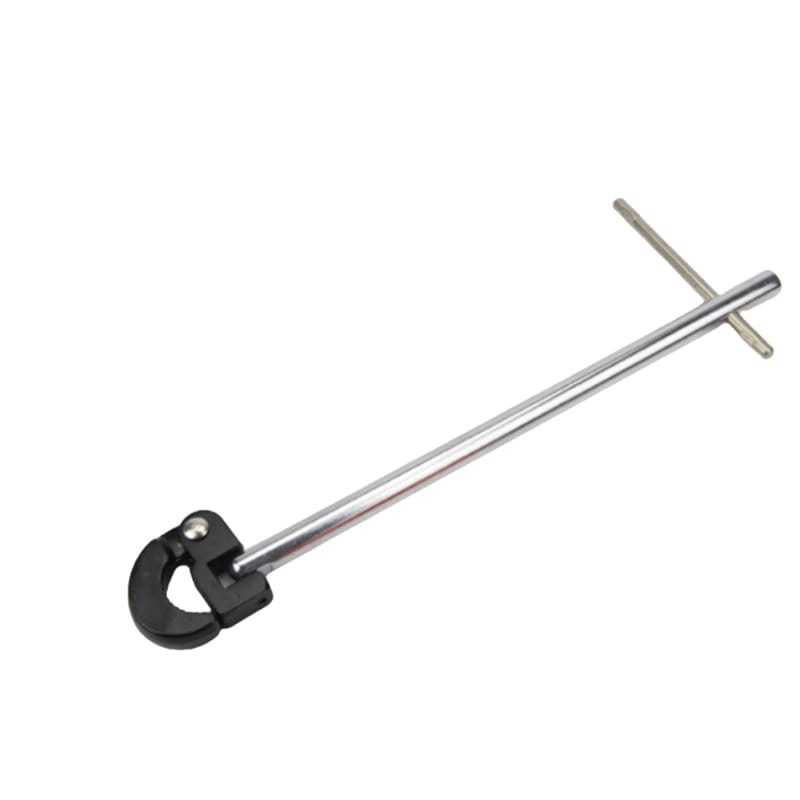
An example such as Adjustable Basin Wrench shows the long shaft and angled gripping head. If the shaft telescopes, make sure the chosen position is positively locked before loading the handle. A head that reaches the nut but sits partly folded can be difficult to keep square during the turn.
Seat it first, then turn
Guide the open jaw onto the nut while watching the contact if possible. Keep hoses and wires out of the jaw. Bring the fixed and moving parts of the head into proper contact before applying meaningful force. The shaft should be positioned so the turning action loads the nut, rather than levering sideways against the faucet shank.
Use the lower cross-handle in short, controlled movements. In a tight cabinet you may need to reposition between turns. Repositioning is normal; slipping off the nut repeatedly is not. If the head starts to climb off, stop and reseat it instead of using the momentum of a longer pull.
Support the faucet above the sink where the removal instructions require it. Once the mounting hardware loosens, the faucet can move or rotate, potentially twisting connected lines. A helper holding the faucet can make the job easier, provided both of you know what is being loosened and keep hands clear of the tool's movement.
If the wrench slips, diagnose the contact
| What happens | Likely issue to inspect | Try before adding force |
|---|---|---|
| Jaw opens as you turn | Head set for the opposite direction | Reverse the pivoting head |
| Teeth only catch one corner | Incomplete seating or unsuitable jaw size | Reposition and check the nut shape |
| Shaft reaches but handle hits the cabinet | Poor approach or insufficient usable reach | Change shaft length or working position |
| Nut and faucet turn together | Faucet is not adequately supported | Stabilise the faucet according to its instructions |
| Plastic fastening begins to deform | Wrong tool or excessive load | Stop and identify the correct removal tool |
Rust, dirt and damaged corners can also reduce the grip. Improve the view and clean accessible debris before deciding that the wrench is too weak. A tool cannot grip an intact hexagon if the surface has already been rounded away. Where the nut is badly damaged, a plumber may be able to remove it without transferring uncontrolled force into the sink or countertop.
A stuck nut is not an invitation to use a longer lever
An old mounting nut may be corroded onto the shank or pressed against a distorted washer. First confirm that you are turning the correct part in the correct direction and that the wrench is fully seated. Those checks sound basic, but they are difficult to make once you are lying awkwardly inside a cabinet.
If a suitable penetrant is permitted for the hardware, protect surrounding surfaces and follow its label, including ventilation and contact-time instructions. Keep it away from materials it may damage. Do not use an open flame in the cabinet to heat the nut. Plumbing, finishes and nearby stored materials make that an especially poor improvisation.
Stop if the sink, faucet body or mounting surface begins to flex instead of the nut turning. Excess force can turn a simple faucet replacement into damage to the fixture. Cutting or splitting a seized fastener is a different job requiring suitable access and protection; it is not something the basin wrench itself solves.
Installing the replacement without creating the next problem
Use the new faucet's mounting instructions rather than tightening until the wrench will no longer move. Different mounting washers, brackets and plastic nuts tolerate different loads. Over-tightening can distort parts or make a future removal much harder. Keep the faucet aligned while the mounting hardware is secured.
Reconnect the water lines using their specified method. Do not add thread tape to every connection by habit: many fittings seal with a washer, gasket or another surface rather than at the threads. Open the water supply as directed, dry the connections and inspect for leaks. Recheck after operating the faucet, because a wet area left from disconnection can otherwise hide a new drip.
Before putting everything back in the cabinet, check that hoses are not kinked and the faucet does not move in its mounting. Leave the area dry enough to spot any later seepage. The job is finished when the faucet is secure and the connections remain dry, not merely when the difficult nut has turned.
What matters when choosing the wrench
For another illustration of the tool's purpose and pivoting head, see RIDGID's basin-wrench information. Use your own wrench's instructions for its capacity and locking mechanism. The principle is straightforward: identify, reach, seat and turn. When one of those stages fails, solve that stage before applying more force.
Frequently asked questions
Can a basin wrench loosen a faucet from above the sink?
Its usual purpose is to reach the mounting hardware underneath. Some faucets use a top-fixing system, which needs the removal method specified for that faucet.
Why does the jaw grip in one direction but slip in the other?
The head is directional. Pivot it to the opposite working position so the turning force closes the jaw onto the nut rather than opening it.
Will it work on plastic mounting nuts?
Only where the nut shape and the faucet instructions permit it. Large wings or special plastic fittings may need a dedicated tool to avoid cracking or deforming them.
Is a longer basin wrench always easier to use?
No. It must reach the nut while leaving room for the head and lower handle. Extra length cannot compensate for a jaw that does not fit the fastening.
Should I tighten the water connection with the same force used to remove the old nut?
No. Removal force from seized hardware says nothing about correct installation force. Follow the instructions for each mounting part and water connection separately.