
Removing a trim panel is rarely difficult because the panel itself is heavy. The real difficulty is controlling dozens of small plastic fasteners without cracking the panel, pulling a clip mount out of the backing, or leaving marks on a visible surface. This is where trim clip removal pliers can be more effective than a conventional pry tool.
Trim clip removal pliers are designed to grip, support, or lift automotive retainers close to the fastener itself. Used correctly, they reduce the amount of bending force transferred into the trim panel and give technicians better control over clips hidden behind door cards, upholstery panels, hood insulation, splash shields, and interior trim.
This guide explains when trim clip removal pliers are the better choice, when a pry tool is still useful, how jaw geometry changes removal performance, what causes clips to break, and what workshops, distributors, and private-label buyers should inspect before selecting a professional tool or kit.
Table of Contents
What Are Trim Clip Removal Pliers?
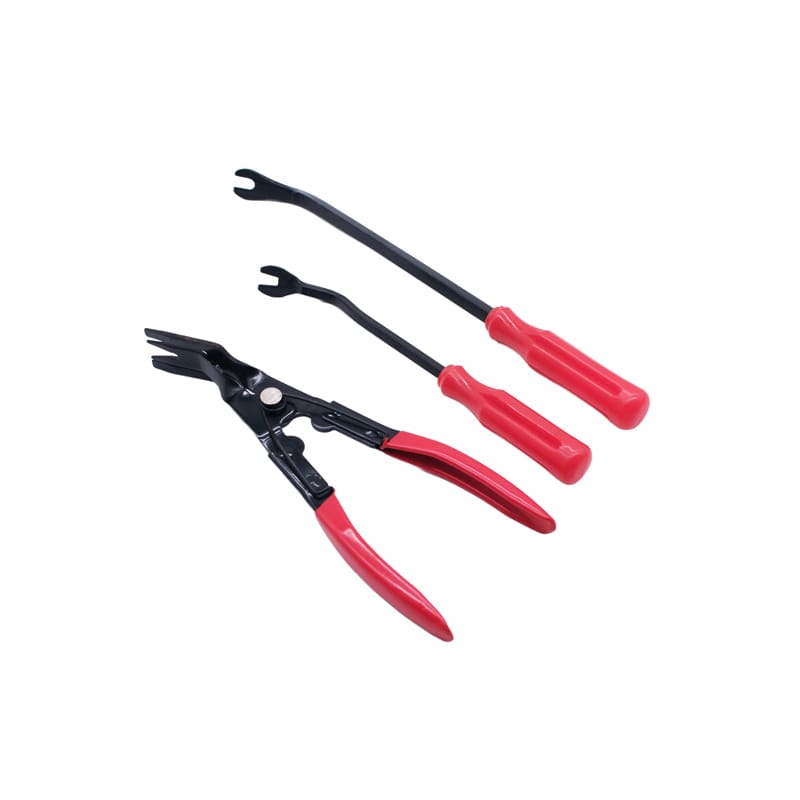
Trim clip removal pliers are hand tools made for extracting push-in clips, trim retainers, upholstery fasteners, and similar automotive panel hardware. Instead of relying only on a single pry blade, the plier mechanism converts a squeeze of the handles into a controlled lifting or gripping action at the fastener.
Depending on the design, trim clip removal pliers may use a forked nose, a stepped tip, opposing lifting surfaces, a narrow jaw, or an angled working head. Some designs are spring-loaded so the handles reopen automatically after each clip is released.
The basic principle is simple: place the working end as close as possible to the clip stem or anchor, apply force in the clip’s release direction, and avoid turning the trim panel itself into the lever.
Fengjie’s 6 PCS Trim & Upholstery Set includes five nylon trim and upholstery tools plus spring-loaded trim clip removal pliers in a storage case. This makes it useful as a mixed-access kit: the plastic tools create controlled gaps around sensitive surfaces, while the pliers address clips that benefit from a squeeze-and-lift action.
Trim Clip Removal Pliers vs. Pry Tools: The Real Difference
Pry tools and trim clip removal pliers are not competing tools. They solve different stages of the same removal problem.
A pry tool is excellent for creating access. A thin or narrow nylon edge can enter a small gap, while a wider wedge can spread load across a larger section of trim. However, once the actual fastener is located, continuing to pry several centimeters away from the clip can bend the panel backing.
Trim clip removal pliers become useful when the fastener is visible or reachable and there is enough space for the jaws to engage it directly.
| Tool | Best Role | Main Advantage | Main Limitation |
|---|---|---|---|
| Narrow nylon pry tool | Opening the first gap | Lower surface-marking risk | Limited extraction force |
| Wide trim wedge | Separating larger panel areas | Spreads load | Cannot always engage the clip stem |
| Forked remover | Direct leverage around a fastener | Simple, precise contact | Requires a levering surface |
| Trim clip removal pliers | Squeezing or lifting clips in accessible areas | Controlled one-hand action | Needs enough space for jaws and handles |
| Long upholstery remover | Reaching deeper retainers | Better reach | Less useful where handle clearance is extremely tight |
A professional workflow often uses both. First, a non-marring tool creates enough access to identify the clip. Then trim clip removal pliers engage the fastener more directly.
For surface-sensitive work, the 4pcs Plastic Auto Car Door Panel Trim Removal Tools Kit Set provides several plastic profiles for interior and exterior trim.
Pairing these shapes with trim clip removal pliers gives the technician separate tools for access and extraction instead of forcing one tool to perform every task.
Why Automotive Clips Break Even With the Correct Tool
Buying trim clip removal pliers does not guarantee damage-free removal. Clips usually fail because the force is applied in the wrong place, the wrong direction, or after the plastic has already become brittle.
Common causes include:
- The panel still has a hidden screw or hook.
- The jaws are placed under the clip head instead of closer to the stem.
- The tool is too wide for the available gap.
- The technician twists while the clip is designed to pull straight out.
- Only one side of the clip is loaded.
- A clip is already cracked from a previous repair.
- The trim panel is pulled before every fastener is released.
- The tool slips and is forced back into position without checking alignment.
If resistance does not make sense, stop and identify the fastener again. Two-piece push rivets, expanding anchors, metal spring clips, threaded retainers, and sliding tabs may require different release methods.
The job of trim clip removal pliers is to give the technician more control—not to make unlimited force safe.
How Jaw Geometry Changes Removal Performance
Two products may both be sold as trim clip removal pliers and behave very differently in the same door panel.
The working end determines where the force goes.
Forked or Split Tips
A forked tip is designed to straddle a clip stem or fit around the anchor. The goal is to support the fastener on more than one side so the lifting force is better centered.
For B2B buyers, important inspection points include:
- Fork opening width
- Symmetry
- Tip thickness
- Inner-edge smoothness
- Taper
- Distance between the contact point and pivot
If the slot is too narrow, the tool may never seat correctly around the clip.
If it is too wide, the jaws may contact the panel instead of the retainer.
Well-designed trim clip removal pliers should balance fastener access with stable contact.
Stepped or Offset Tips
A stepped tip can help the jaws get under a fastener while keeping the rest of the tool clear of the panel surface.
This can be especially useful in recessed areas where a completely flat jaw cannot reach the clip stem.
The important issue is how the tip contacts the fastener. The step should improve access without concentrating unnecessary force on a fragile plastic edge.
Flat and Angled Working Heads
Flat trim clip removal pliers can reach deeper behind some panels because the working head stays closer to the trim surface.
Angled heads can improve access where the handles would otherwise hit:
- The door shell
- Dashboard components
- Adjacent trim
- Seat structures
- Cargo-area panels
Neither layout is automatically better.
The intended application should determine the angle.
Jaw Thickness
Thin jaws enter narrow gaps more easily, but they need enough strength and edge quality to resist deformation.
Thicker jaws may offer greater rigidity, but they usually require a larger gap.
For OEM and private-label buyers, this is an important distinction.
“Heavy duty” should not simply mean thicker.
A good pair of trim clip removal pliers needs a practical balance between access, strength, and contact geometry.
Why Spring-Loaded Handles Matter in Repetitive Work
Many trim clip removal pliers use a spring to reopen the handles after each squeeze.
This does not automatically make the tool stronger, but it can make repeated clip removal more convenient.
Consider a technician removing:
- A front door panel
- Rear interior trim
- Trunk lining
- Hood insulation
- Several dashboard fasteners
The tool may be opened and closed dozens of times during one repair.
A return spring reduces the need to manually reopen the handles after every fastener.
Buyers should check:
- Return force
- Spring alignment
- Spring retention
- Whether the spring remains seated after repeated cycles
- Whether it interferes with the hand during operation
The NIOSH Guide to Selecting Non-Powered Hand Tools discusses choosing hand tools according to the actual task while considering grip, force, repetition, and posture.
For trim clip removal pliers, that makes handle spacing, spring force, grip design, and working angle practical product features rather than cosmetic details.
Where Trim Clip Removal Pliers Work Best
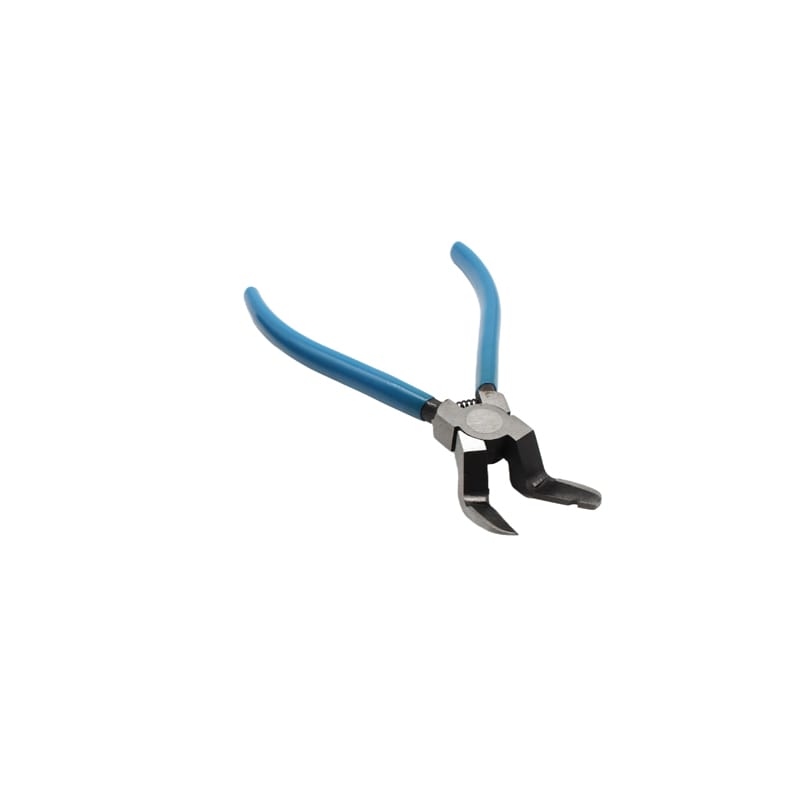
Trim clip removal pliers are most useful when the fastener can be reached directly and a squeeze-operated lifting action offers more control than prying from a distance.
Door Panels
Door cards often use push-in clips around the lower and side perimeter.
A plastic wedge can create the initial gap. Once the fastener becomes accessible, trim clip removal pliers can engage suitable retainers directly.
Before removing the panel, always confirm whether screws remain around:
- Door handles
- Switch panels
- Armrests
- Storage pockets
- Decorative covers
- Speaker areas
Some door panels also hook onto the upper window ledge and need to be lifted after the perimeter clips release.
Removing the clips correctly does not mean the entire panel should immediately be pulled straight outward.
Upholstery, Liners, and Interior Panels
Trunk trim, cargo panels, kick panels, seat-area trim, hood insulation, and some interior liners use removable push fasteners that can be difficult to grip with fingers.
In these situations, trim clip removal pliers may provide more direct control.
However, hooks, sliding tabs, restraint-related trim, and two-piece expanding rivets may require another method.
Confined Areas
Around dashboards and deeper door structures, jaw angle and handle clearance become critical.
A conventional plier may have the correct tip but still be difficult to operate because the handles hit another component.
This is why trim clip removal pliers should be selected for the working environment as well as the fastener size.
A Damage-Controlled Method for Using Trim Clip Removal Pliers
The exact vehicle procedure should always take priority, but the following sequence provides a useful general framework.
Identify the Fastener Before Applying Force
Use lighting and a small inspection gap to determine whether you are dealing with:
- A push clip
- Expanding rivet
- Hook
- Screw
- Metal spring retainer
- Sliding fastener
- Another attachment system
Do not use trim clip removal pliers simply because a panel feels stuck.
Create Access With a Non-Marring Tool
A plastic wedge is often the safer first contact point on visible interior trim.
Open only enough space to identify the clip.
The goal is access, not immediate removal.
Position the Jaws Close to the Clip Stem
Move the trim clip removal pliers toward the fastener so the working surfaces contact the clip rather than a wide area of the panel.
If the jaws cannot seat properly, change the angle or use another tool profile.
Keep the Release Direction in Mind
Many push-in clips release by moving away from the mounting hole.
But not every fastener works the same way.
Avoid excessive sideways twisting unless the fastener design requires it.
Squeeze Progressively
Apply smooth pressure.
A progressive squeeze gives the technician feedback if:
- The clip begins deforming
- The jaws start slipping
- The tool is incorrectly positioned
- The panel starts carrying too much load
A sudden high-force squeeze provides less opportunity to correct poor engagement.
Support the Panel After Release
When one clip releases, do not allow the panel to fall away and transfer all the load to:
- The next fastener
- Wiring harnesses
- Speaker connectors
- Door-latch cables
- Switch wiring
Continue around the panel in a controlled sequence.
Inspect the Clip Before Reuse
A clip can come out in one piece and still be distorted.
Inspect:
- Locking ribs
- Stem condition
- Head shape
- Mounting fit
- Cracks
- Permanent deformation
Replace damaged retainers rather than creating a loose panel or future rattle.
When You Should Not Use Trim Clip Removal Pliers
Knowing when not to use trim clip removal pliers is part of professional tool selection.
Choose another method when:
- The panel is still secured by screws.
- The fastener must be unlocked before extraction.
- The trim uses a sliding or hooked attachment.
- The jaws cannot seat around the fastener correctly.
- The tool would press directly against a fragile finished surface.
- Access is too limited to operate the handles safely.
For deeper single-lever access, the 8.6-inch Upholstery Panel Clip Remover may be more appropriate.
For stronger trim, fastener, and molding work, the Car Trim Panel Clip Cutter Puller Fastener Rivets Remover provides another metal-tool profile.
A useful automotive trim kit does not make every tool interchangeable.
It gives the technician several controlled approaches.
Material and Manufacturing Details B2B Buyers Should Inspect
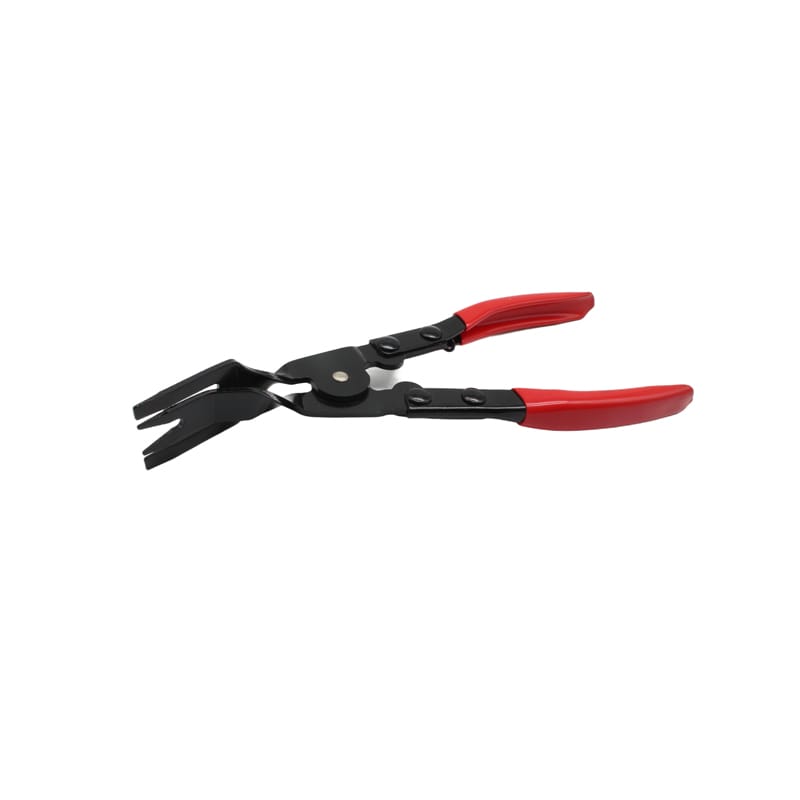
For a workshop, one defective pair of trim clip removal pliers is inconvenient.
For a distributor ordering hundreds or thousands of units, inconsistency becomes a product-line problem.
Steel, Heat Treatment, and Jaw Recovery
The working jaws need enough strength to resist permanent bending during normal use.
Buyers should request actual material information instead of relying only on descriptions such as:
- High strength
- Professional grade
- Industrial grade
- Heavy duty
After repeated sample testing, check whether the tips still align and return to the intended geometry.
ISO 5743:2021 covers general technical requirements for pliers and nippers. Buyers developing internal specifications can reference the official ISO 5743 overview while confirming which standards actually apply to their specific tool design and target market.
Pivot, Spring, and Finish
Check the pivot for:
- Excessive side play
- Binding
- Uneven movement
- Jaw misalignment
- Abnormal friction
If the trim clip removal pliers use a return spring, verify consistent reopening after repeated cycles.
The working edges should also be free from burrs that could mark trim or damage plastic retainers.
Handle Retention
Coated or sleeved handles should remain secure during repeated squeezing.
The ISO information for general plier requirements also notes that ordinary plastic coatings or sleeves are intended for gripping comfort and should not automatically be considered electrical insulation.
Do not market ordinary trim clip removal pliers as electrically insulated unless the product has actually been designed and certified for that purpose.
Ergonomics and Safety in Repetitive Clip Removal
Trim clip removal pliers are often used in awkward positions.
A technician may be:
- Leaning through a door opening
- Reaching underneath a dashboard
- Working inside a cargo area
- Holding a trim panel with the opposite hand
- Trying to keep the jaws aligned with a partially hidden fastener
Handle opening width, grip texture, spring force, tool length, and wrist angle therefore affect control.
The NIOSH hand-tool guide recommends selecting tools around the actual task and reducing unnecessary force, repetition, and awkward posture where practical.
A pair of trim clip removal pliers that feels comfortable on a workbench may still be unsuitable if the handles strike a door frame before the jaws complete their movement.
Before repeated use:
- Inspect the jaws.
- Check the pivot.
- Confirm the spring is secure.
- Check handle retention.
- Remove bent or damaged tools from service.
- Keep fingers clear of pinch points.
- Use appropriate eye protection where brittle fasteners could release suddenly.
OSHA’s Hand and Power Tools guidance emphasizes keeping tools in safe condition and controlling common hand-tool hazards.
How to Compare Trim Clip Removal Pliers Samples Before a Bulk Order
A catalog photo cannot show whether trim clip removal pliers will remain aligned after repeated use.
B2B sample testing should recreate the actual job.
| Test Area | What to Evaluate | Why It Matters |
| Jaw access | Can the tips enter representative panel gaps? | Determines application coverage |
| Clip engagement | Do the jaws center around several fastener sizes? | Helps control slipping |
| Extraction control | Can clips be removed without excessive rocking? | Shows whether geometry is practical |
| Jaw recovery | Do the tips remain aligned after repeated force? | Indicates deformation resistance |
| Pivot consistency | Is movement smooth without excessive play? | Affects precision |
| Spring cycle | Does the tool reopen consistently? | Important for repetitive workshop use |
| Handle retention | Does the grip stay secure under load? | Supports control |
| Surface finish | Are edges and coatings consistent? | Reduces quality complaints |
| Packaging | Are intended uses clearly explained? | Helps correct use and retail conversion |
Do not test only one easy fastener.
Use several representative clip designs that reflect the applications promised for the product.
For private-label programs, keep approved samples and dimensional records so future batches of trim clip removal pliers can be compared with the original specification.
Building a Better Trim Removal Kit Around the Pliers
Trim clip removal pliers become more useful when the surrounding kit helps the technician reach the fastener properly.
A logical professional set can combine:
- Narrow nylon entry tool
- Wide panel wedge
- Forked plastic remover
- Long upholstery remover
- Trim clip removal pliers
- Small hook or pick
- Storage pouch or case
Each tool should have a clear role.
Plastic profiles handle first contact with visible trim.
Longer removers reach hidden fasteners.
The trim clip removal pliers address accessible push-in clips that benefit from a squeeze-driven extraction method.
This approach also helps distributors create logical product levels.
An entry-level set might contain several plastic profiles.
A mid-level kit could add a dedicated upholstery remover.
A professional kit can combine nylon tools, trim clip removal pliers, and selected metal fastener tools.
Fengjie’s Car Body and Interior Tools category includes multiple relevant products for door panels, upholstery, fasteners, molding, and interior repair.
OEM and Private-Label Questions to Resolve Before Production
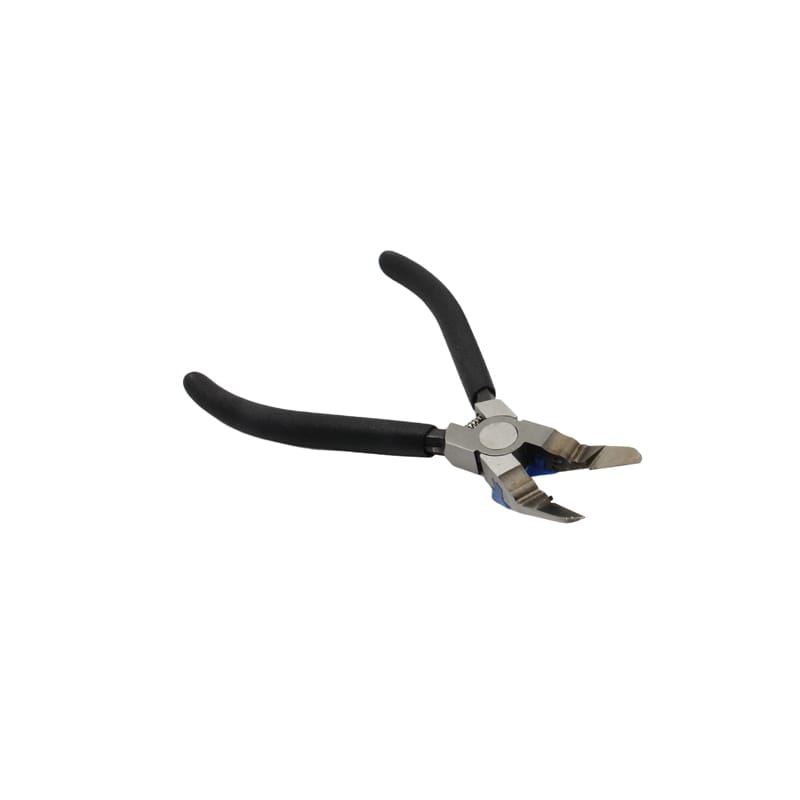
If trim clip removal pliers will be sold under a private label, the specification should go beyond a logo and handle color.
Define:
- Target customer
- Main fastener types
- Required jaw geometry
- Working-tip thickness
- Material specification
- Heat-treatment target
- Pivot construction
- Spring design
- Handle material
- Surface finish
- Storage format
- Packaging language
- Barcode and label requirements
- Inspection criteria
- After-sales strategy
Do not describe an ordinary coated handle as insulated unless the product has the necessary design and certification.
For a multi-piece kit, buyers should also define why every tool is included.
A kit with seven genuinely different working profiles is often more useful than a larger set filled with repeated shapes.
Fengjie supports OEM, ODM, and wholesale automotive tool projects. Buyers can use the Contact Us page to discuss target applications, packaging, tool combinations, and branding requirements.
FAQ
What are trim clip removal pliers used for?
Trim clip removal pliers are used to extract automotive push clips, trim retainers, upholstery fasteners, and similar panel hardware.
Their jaws work close to the fastener so less force needs to be transferred through the surrounding trim panel.
Are trim clip removal pliers better than a pry tool?
They are better for some stages, not all.
A pry tool is usually useful for creating the initial gap.
Trim clip removal pliers become more useful once the fastener can be reached directly and a controlled squeeze or lift can engage it.
Can trim clip removal pliers remove door panels?
They can remove many clips used to retain a door panel.
However, the panel may also contain screws, upper hooks, switch connectors, latch cables, and other attachments.
The correct vehicle-specific disassembly sequence should still be followed.
Do trim clip removal pliers damage plastic fasteners?
Correctly sized and positioned trim clip removal pliers can reduce the risk of damage compared with pulling a panel from farther away.
Fasteners can still break if the jaws are misaligned, the clip is brittle, or force is applied in the wrong direction.
Why are some trim clip removal pliers spring-loaded?
A return spring automatically reopens the handles after each squeeze.
This can make repetitive work more convenient, particularly when many clips need to be removed during one repair.
What should distributors check before ordering trim clip removal pliers?
Buyers should evaluate:
- Jaw geometry
- Tip thickness
- Material specification
- Heat treatment
- Pivot alignment
- Spring performance
- Handle retention
- Surface finish
- Packaging
- Batch consistency
Samples should be tested on representative automotive fasteners rather than judged only from photographs.
Should trim clip removal pliers have insulated handles?
Ordinary plastic or rubber-style handle coatings should not automatically be considered electrically insulated.
If electrical protection is required, buyers need tools specifically designed and certified for that purpose.
Can trim clip removal pliers be included in an OEM trim removal kit?
Yes.
Trim clip removal pliers pair naturally with nylon pry tools, upholstery removers, forked clip tools, picks, and storage cases.
The final combination should match the target customer and actual repair applications.
Conclusion
Trim clip removal pliers solve a specific problem that ordinary pry tools do not: they let the technician apply controlled extraction force close to an automotive fastener instead of bending the surrounding panel.
That makes them especially useful for:
- Door panels
- Upholstery trim
- Insulation retainers
- Interior panels
- Selected exterior plastic fasteners
- Other applications where push clips need to be removed repeatedly
The best results still depend on correct technique.
Create access first, identify the fastener, seat the jaws close to the clip, follow the correct release direction, and stop when resistance suggests that another attachment is still holding the panel.
For workshops, reliable trim clip removal pliers can improve consistency during repeated interior work.
For distributors and OEM buyers, the most important sourcing factors are jaw geometry, material and heat treatment, pivot quality, spring consistency, handle ergonomics, surface finish, and repeat-production control.
Explore Fengjie’s 6 PCS Trim & Upholstery Set, related Car Body and Interior Tools, or contact Fengjie Tools to discuss wholesale, OEM, private-label packaging, and custom automotive trim tool kits.