
Removing a vehicle door panel looks simple until the first hidden fastener refuses to release. One rushed pull can crack a plastic mount, bend the panel backing, snap a reusable clip, or leave a visible pry mark on a finished surface. An upholstery clip remover is designed to solve that specific problem by applying controlled leverage close to the clip rather than forcing the entire panel away from the door.
For technicians, installers, body shops, and tool distributors, the real value is repeatability. A well-matched upholstery clip remover helps engage the fastener correctly, control leverage, and preserve both the trim panel and surrounding surface. This guide covers clip types, tool selection, door-panel technique, common mistakes, and B2B sourcing checks.
Table of Contents
What Is an Upholstery Clip Remover?
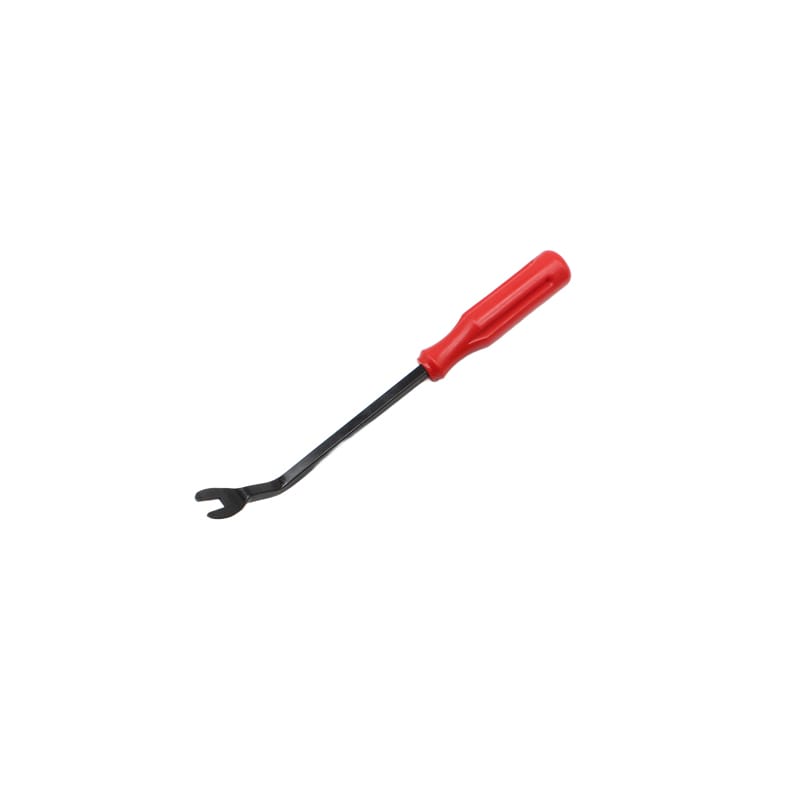
An upholstery clip remover is a hand tool used to release clips, fasteners, retainers, and studs that hold vehicle door panels, upholstery panels, interior trim, dashboards, molding, and related components in place.
The working end is usually forked, notched, or slotted. Instead of prying against the middle of the trim panel, the tool slides around or close to the clip stem. This puts the lifting force nearer to the fastener and reduces bending stress on the panel.
The basic action is simple:
- Create a small controlled gap.
- Identify the approximate clip position.
- Slide the upholstery clip remover toward the fastener.
- Center the fork or notch around the clip stem.
- Apply steady leverage close to the clip.
- Stop when the clip releases.
- Inspect the clip before moving to the next point.
Pulling the panel by hand often applies force too far from the fastener, turning the panel itself into the lever.
Fengjie’s 8.6″ Upholstery Panel Clip Remover uses carbon steel and PP construction and is listed at 22 cm long. Buyers who need several access profiles can also consider the 4pcs Plastic Auto Car Door Panel Trim Removal Tools Kit Set, which is described for interior and exterior trim work and includes an upholstery-clip-removal function.
Why Door Panel Clips Break During Removal
Most broken clips are not caused by a lack of strength in the tool. They are caused by poor access, incorrect force direction, or a mismatch between the remover and the clip.
Common reasons include:
- Pulling the panel before all screws are removed.
- Prying too far away from the clip.
- Using a fork opening that is too narrow or too wide.
- Inserting the tool at the wrong angle.
- Applying sudden force instead of progressive leverage.
- Trying to reuse clips that are already brittle or damaged.
- Pulling sideways when the clip is designed to release outward.
- Using a metal edge directly against a delicate painted or soft-touch surface.
- Failing to identify hooks or sliding retainers that are not designed to be pried.
An upholstery clip remover cannot compensate for an unknown panel structure. Before applying force, locate visible screws, hidden covers, switch bezels, door-handle fasteners, and possible upper hooks.
If the panel remains firmly attached after several fasteners have released, stop and check for another screw or a different retention method. Increasing leverage without knowing what is still holding the panel is one of the fastest ways to turn a routine removal into a damaged component.
For a broader look at the different tool shapes used around vehicle fasteners, see Fengjie’s existing Clip Remover Tools Manufacturer Guide. The existing guide covers broad clip-removal applications, while this article focuses specifically on using an upholstery clip remover around door and interior panels.
How Upholstery Clips and Trim Fasteners Actually Hold a Panel
To select the right upholstery clip remover, it helps to understand what the tool is trying to release.
Common Fastener Types
Push clips compress into holes and release most cleanly when leverage is applied close to the stem.
Christmas-tree or fir-tree fasteners use multiple ribs along the stem and can require stronger, progressive extraction.
Two-piece push rivets often need the center pin released before the outer body is removed.
Metal spring clips may demand more leverage and better protection for nearby surfaces.
Not every attachment is a pull-out clip. Upper door panels and decorative pieces may use hooks or sliding retainers.
Before using an upholstery clip remover, identify whether the attachment is designed to pull outward, slide, lift, or unlock.
That simple distinction matters. A tool that works perfectly on a conventional push fastener can damage a hooked trim component if the user assumes every attachment should release in the same direction.
Upholstery Clip Remover vs. Plastic Trim Tool: Which Should You Use?
These tools work together, but they solve different problems.
A plastic trim tool is useful for creating initial access, lifting decorative covers, separating wide panel edges, and working around surface-sensitive materials. An upholstery clip remover is more focused on the fastener itself.
| Tool Type | Best Use | Main Advantage | Main Limitation |
|---|---|---|---|
| Wide nylon wedge | Initial panel separation | Spreads force across a larger area | May not reach the clip stem |
| Narrow plastic pry tool | Tight gaps and small covers | Lower surface-marking risk | Limited leverage on stubborn clips |
| Forked metal clip remover | Resistant door-panel clips | Strong, precise leverage | Requires careful surface protection |
| Plastic forked remover | Delicate panels and common clips | Lower scratching risk | May flex on very tight fasteners |
| Clip-removal pliers | Accessible clips and retainers | Controlled pulling action | Requires sufficient working space |
A practical workflow is often to begin with a non-marring plastic tool to create a small gap, then move the upholstery clip remover closer to the actual fastener.
This approach avoids forcing a metal tool through a tight finished surface just to locate the clip.
Fengjie’s 6 PCS Trim & Upholstery Set combines five trim and upholstery tools with spring-loaded trim clip removal pliers. A mixed set can be useful where technicians need both surface-sensitive access and stronger clip extraction during the same job.
How to Use an Upholstery Clip Remover on a Car Door Panel
The exact disassembly sequence depends on the vehicle. Vehicle-specific repair information should therefore take priority over a generic procedure.
The following steps explain the tool logic.
Start With a Visual and Manual Inspection
Check the panel for:
- Screw covers.
- Grab-handle fasteners.
- Door-handle bezels.
- Switch panels.
- Speaker covers.
- Courtesy lights.
- Mirror trim.
- Lower-edge screws.
- Visible clip positions.
- Upper hooks or window-line retainers.
Do not begin with the upholstery clip remover until known screws, covers, and removable bezels have been addressed.
Create a Small Gap at a Low-Risk Entry Point
Use a narrow non-marring tool where the panel design allows access.
The goal is not to pry the panel off. The goal is simply to create enough space to locate the first clip.
A work light or inspection mirror can help. If the clip cannot be seen directly, gently move the panel only enough to identify where it remains anchored.
Move the Tool Toward the Clip
Once the fastener location is identified, slide the upholstery clip remover along the panel edge until the fork approaches the clip stem.
The closer the tool is to the clip, the less bending load is transferred into the panel backing.
This is one of the biggest differences between controlled clip removal and simply pulling the panel by hand.
Center the Fork Around the Fastener
The opening should straddle the stem where possible.
If the upholstery clip remover presses against only one side of the fastener, the tool may twist the clip rather than withdraw it.
If the tool cannot seat correctly, select another profile instead of forcing an undersized slot onto the fastener.
Apply Progressive Leverage
Use steady pressure rather than a sudden snap.
Progressive force gives feedback and allows the technician to stop if the clip is not moving as expected.
A sudden pull provides very little opportunity to recognize that the fork is incorrectly positioned.
Support the Panel as Each Clip Releases
When one clip releases, the panel may move outward suddenly.
Support it so the next fastener, electrical connector, latch cable, or wiring harness does not take the load.
Then reposition the upholstery clip remover at the next clip and repeat the process.
Confirm the Final Panel Movement
Many door panels hook over the upper door flange near the window.
After the side and lower clips release, the final movement may be upward rather than directly outward.
Confirm the design before pulling. A technician can remove every push clip correctly and still damage the panel at the final step by moving it in the wrong direction.
Choosing the Right Fork Opening and Tool Geometry
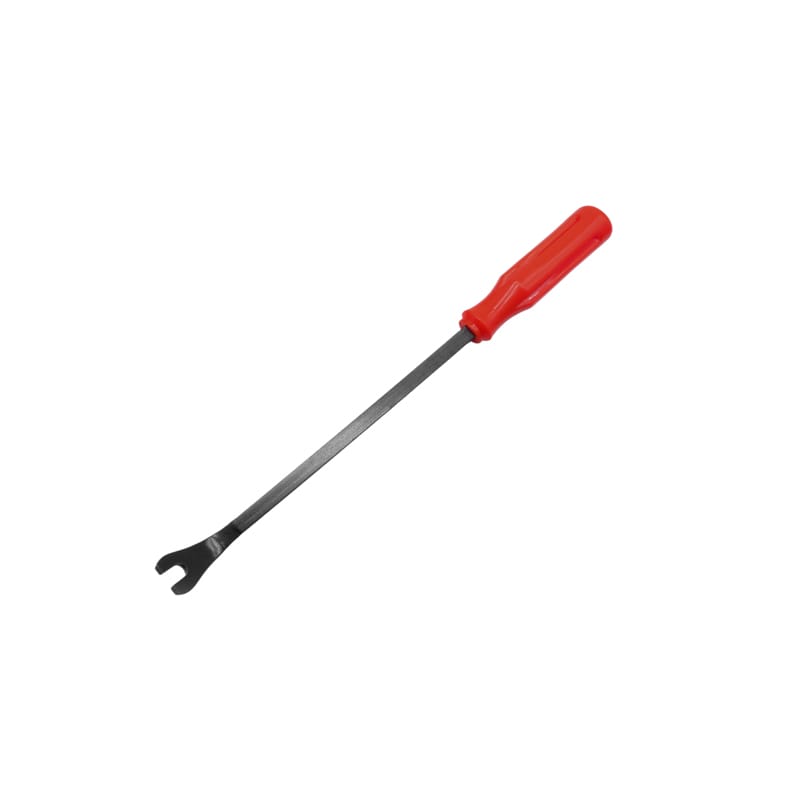
An upholstery clip remover looks simple, but small differences in geometry can change how well it works.
Fork Width
The slot should fit around the fastener stem without excessive side pressure.
A narrow slot may not seat fully. A very wide opening may contact the panel rather than the fastener.
For distributors, offering more than one fork width can make a clip-removal product line useful across a wider range of vehicle retainers.
Tip Thickness
A thinner tip can enter tighter gaps but still needs enough strength to resist permanent bending.
A thicker tool may offer greater rigidity but require more panel separation before it reaches the clip.
The correct design depends on intended applications rather than simply maximizing thickness.
Head Angle
Straight heads work well when the fastener can be approached directly.
Angled or offset heads can improve leverage where a clip sits behind a lip or deeper inside a panel edge.
Shaft Length and Handle Shape
Longer shafts improve reach; shorter tools provide more direct control. Balance matters as much as length.
The handle should remain stable under leverage without creating unnecessary pressure points.
The NIOSH guide to selecting non-powered hand tools explains that hand-tool selection should consider force, repeated movement, and awkward body positions. For a workshop upholstery clip remover, grip texture, balance, and working angle are therefore practical selection factors rather than purely cosmetic features.
Metal vs. Nylon Upholstery Clip Remover Tools
There is no universal winner. Material should be selected according to the surface, fastener, and access condition.
When Metal Makes Sense
A carbon-steel or alloy-steel upholstery clip remover is useful when:
- The clip is firmly seated.
- Working space is limited.
- The fastener needs concentrated leverage.
- The tool must resist repeated flexing.
- The surrounding surface can be adequately protected.
Metal tools can be thin and strong, which helps around deep clips.
However, bare metal edges can mark paint, coated trim, or soft plastic if the user does not control the working point.
When Nylon or PP Makes Sense
Plastic and nylon tools are useful when:
- The surface is highly visible.
- The panel finish is easily marked.
- The clip is not extremely tight.
- The first task is to create access.
- A wider contact area is preferable.
For many jobs, the most practical answer is not “metal or plastic.”
It is a sequence: use plastic to create controlled access and then use a correctly positioned upholstery clip remover to release the fastener.
8 Common Mistakes When Using an Upholstery Clip Remover
1. Using the Tool Before Removing Hidden Screws
If a panel still has a screw behind the grab handle, switch bezel, or decorative cover, clip-removal force will not release it safely.
2. Prying in the Middle of the Panel
The fastener should carry the extraction force.
The panel itself should not become the lever.
3. Levering Against a Visible Surface Without Protection
Even a smooth metal tool can leave a pressure mark.
Use a non-marring access tool or suitable protection where necessary.
4. Pulling at an Angle
If the clip is designed to withdraw perpendicular to the panel, sideways force can bend or shear it.
The upholstery clip remover should be aligned as closely as practical with the intended release direction.
5. Continuing After the Tool Slips
Stop, reposition, and verify the clip location instead of increasing force.
A slipping tool normally indicates that the engagement point needs attention.
6. Treating Every Fastener as Reusable
Inspect clips after removal and replace cracked, distorted, or loose fasteners.
Reassembly quality depends on the condition of the retainers as well as the panel itself.
7. Letting the Panel Hang From Wiring
Support the panel after the last clips release.
Connectors, wiring harnesses, and latch cables are not panel supports.
8. Using One Upholstery Clip Remover for Every Clip Type
Different fork widths, tip angles, materials, and lengths exist for a reason.
Match the upholstery clip remover to the fastener instead of forcing one tool into every application.
How an Upholstery Clip Remover Fits Into Door, Window, and Interior Repair
Many automotive repairs begin with trim removal.
Typical applications include:
- Door speaker work.
- Window and door-glass access.
- Door-lock and latch service.
- Mirror wiring.
- Interior switch repair.
- Weatherstrip access.
- Dashboard trim.
- Upholstery repair.
- Body repair preparation.
- Accessory installation.
For this reason, an upholstery clip remover fits naturally into a broader Car Body and Interior Tools product line.
A stronger metal option such as Fengjie’s Car Trim Panel Clip Cutter Puller Fastener Rivets Remover is described for door panels, molding, window trim, clips, fasteners, emblems, radios, and related trim work. It can therefore complement a conventional upholstery clip remover where different clip structures require another working profile.
Safety and Ergonomics During Repetitive Clip Removal
An upholstery clip remover is a simple hand tool, but repetitive hand-tool work still deserves attention.
OSHA’s hand and power tool guidance notes that hand and power tools can create serious hazards when used or maintained improperly.
For clip-removal work, practical precautions include:
- Inspect the shaft and handle for damage.
- Do not continue using a bent or cracked tool.
- Keep the working tip away from hands and wiring.
- Use appropriate eye protection where fasteners may release suddenly.
- Keep the wrist in a controlled position where possible.
- Avoid repeated high-force prying when the fastener has not been properly engaged.
- Improve access rather than applying excessive force from a poor angle.
NIOSH ergonomics guidance identifies forceful exertion, repetitive motion, and awkward posture among factors that can contribute to work-related musculoskeletal disorders.
For a workshop performing many interior jobs, a better upholstery clip remover is therefore not simply the strongest tool. It is one that combines adequate strength with a practical grip, useful geometry, controlled leverage, and reliable access to common fasteners.
What B2B Buyers Should Check Before Sourcing Upholstery Clip Removers
For distributors and private-label automotive tool brands, an upholstery clip remover should be evaluated beyond appearance and packaging.
Steel Material and Heat Treatment
If the working shaft is carbon steel or alloy steel, buyers should verify the stated material and production controls.
The shaft needs enough strength to resist permanent deformation during normal clip-removal work without becoming unnecessarily brittle.
Fork Geometry Consistency
Check:
- Fork width.
- Symmetry.
- Tip thickness.
- Edge finish.
- Slot depth.
- Shaft-to-head alignment.
The working end determines whether the upholstery clip remover seats correctly around the fastener.
Small inconsistencies can become significant when a distributor is buying the same SKU over repeated production runs.
Surface Finish
Inspect samples for:
- Burrs.
- Sharp unintended corners.
- Coating defects.
- Rough edges.
- Corrosion-prone areas.
- Poor transitions between shaft and handle.
A tool designed to operate near finished interior surfaces should not leave the factory with uncontrolled sharp edges.
Handle, Finish, and Packaging
The handle should remain secure under repeated leverage.
Buyers should inspect grip texture, balance, shaft-to-handle retention, surface finish, and corrosion protection instead of relying only on generic durability claims.
For retail or private-label sales, packaging should explain what the upholstery clip remover is designed to remove, provide sensible safety guidance, and identify related tools where applicable.
Single Upholstery Clip Remover or Multi-Piece Kit?
The answer depends on the target customer.
A Single Tool Works Well For
- Replacement sales.
- Technicians who already own trim wedges.
- Customers with a defined door-panel application.
- Compact retail programs.
- Entry-level private-label products.
A Multi-Piece Kit Works Better For
- Workshops handling different vehicle interiors.
- Car audio installers.
- Body repair shops.
- Window and door service work.
- Retail customers who need several access profiles.
- Distributors building a complete interior-service category.
A kit should not add tools simply to increase piece count.
Each profile should solve a different access or fastener problem.
Fengjie’s 4pcs Plastic Auto Car Door Panel Trim Removal Tools Kit Set supports multiple trim-removal profiles, while the 6 PCS Trim & Upholstery Set adds clip-removal pliers.
These products can be positioned alongside a dedicated upholstery clip remover rather than being treated as identical tools.
OEM and Private-Label Opportunities for Upholstery Clip Removers
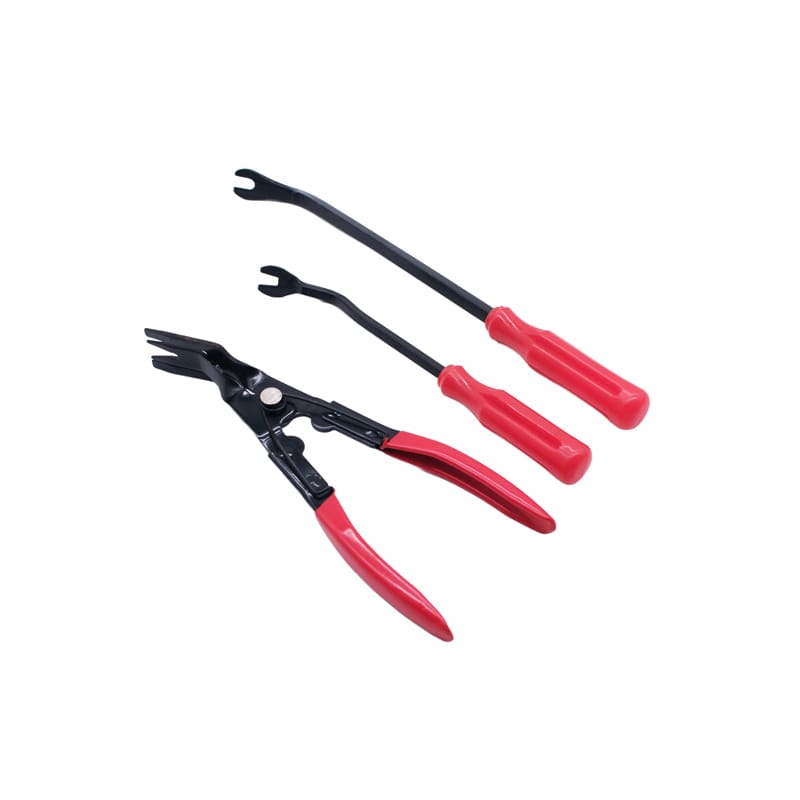
For B2B buyers, the upholstery clip remover category can work as a standalone hand tool or as part of a broader automotive trim kit.
Depending on the supplier’s actual manufacturing capability and the buyer’s project requirements, an OEM program may consider:
- Handle color.
- Logo application.
- Retail card or box design.
- Tool pouch or storage tray.
- Multiple fork-size combinations.
- Set configuration.
- Barcode and label requirements.
- Instruction languages.
- Distributor packaging.
- Master carton configuration.
Before developing an OEM upholstery clip remover, define the target customer.
A body shop may prioritize stronger metal tools and several fork sizes.
An interior-accessory installer may place greater value on non-marring access tools and compact storage.
A clear application brief gives the supplier a better foundation for building a logical product than simply requesting “more pieces.”
FAQ
What is an upholstery clip remover used for?
An upholstery clip remover is used to release trim clips, door-panel fasteners, upholstery retainers, and similar automotive clips by applying leverage close to the fastener rather than pulling on the panel.
Can an upholstery clip remover remove door panels?
Yes. It can release many of the clips that hold a door panel in place.
However, screws, switch panels, handles, upper hooks, electrical connections, and other retainers may also need to be removed before the panel can come away safely.
Is a metal upholstery clip remover safe for interior trim?
It can be when correctly positioned and used with suitable surface protection.
On highly visible or soft surfaces, a nylon tool is often preferable for creating the first gap before the metal upholstery clip remover engages the fastener.
Why does the forked end have a slot?
The slot allows the upholstery clip remover to fit around or close to the clip stem so lifting force is concentrated nearer to the fastener.
This reduces bending stress on the panel compared with pulling from farther away.
Should broken door-panel clips be reused?
Clips that are cracked, distorted, loose, or no longer retain properly should be replaced with the correct fastener.
Are plastic trim tools better than an upholstery clip remover?
They are complementary.
Plastic trim tools are useful for surface-sensitive access and initial separation, while a focused upholstery clip remover can provide stronger and more precise extraction directly at the fastener.
What should distributors test before ordering?
Test working-tip geometry, shaft strength, handle retention, surface finish, repeated leverage performance, packaging, and batch consistency.
An upholstery clip remover should be evaluated on representative automotive fasteners rather than judged only from photographs.
Can upholstery clip remover tools be customized?
Depending on manufacturing capability, possible options may include handle color, logo, packaging, tool combinations, and instructions.
Buyers should confirm the exact OEM specification with the supplier before placing an order.
Conclusion
An upholstery clip remover is a small tool with a very specific job: transferring removal force from the trim panel to the fastener itself.
When the tool is correctly sized, positioned close to the clip, and used with controlled leverage, it can reduce broken fasteners, damaged panel mounts, surface marks, and unnecessary rework.
For technicians, the best results come from combining a dedicated upholstery clip remover with non-marring access tools and a clear understanding of how the panel is retained.
For workshops, several fork widths and tool profiles are more useful than relying on one universal remover.
For distributors and private-label buyers, steel quality, working-tip geometry, handle retention, finish, ergonomics, and repeat-production consistency deserve more attention than inflated piece counts or vague durability claims.
Fengjie offers the 8.6″ Upholstery Panel Clip Remover together with related Car Body and Interior Tools.
For wholesale supply, OEM development, private-label packaging, or custom trim-removal tool sets, contact Fengjie Tools with your intended market, target applications, preferred kit structure, and branding requirements.