
Automotive trim clips may be small, but removing them incorrectly can cause expensive problems. A plastic retainer can crack, a fastener head can break, a door panel can become distorted, or a painted surface can be scratched when a technician applies force in the wrong direction. These problems are particularly common during door panel removal, window trim replacement, interior repairs, and automotive bodywork.
Automotive trim clip removal pliers provide a more controlled way to release certain clips and fasteners than improvised tools. Their jaws are designed to access the fastener head or retaining point and apply leverage close to the attachment, helping technicians remove suitable clips without concentrating excessive force on the surrounding panel.
However, not every automotive fastener uses the same retention mechanism. Some clips require a dedicated forked remover, some need a trim wedge, and others must be rotated, unscrewed, or released by pressing a locking tab. Choosing the correct tool is therefore just as important as knowing how to use it.
This guide explains how automotive trim clip removal pliers work, which automotive repair jobs benefit from them, how to remove stubborn fasteners safely, what separates a well-made tool from a poor one, and what professional workshops, distributors, and OEM buyers should evaluate before sourcing a product.
What Are Automotive Trim Clip Removal Pliers?
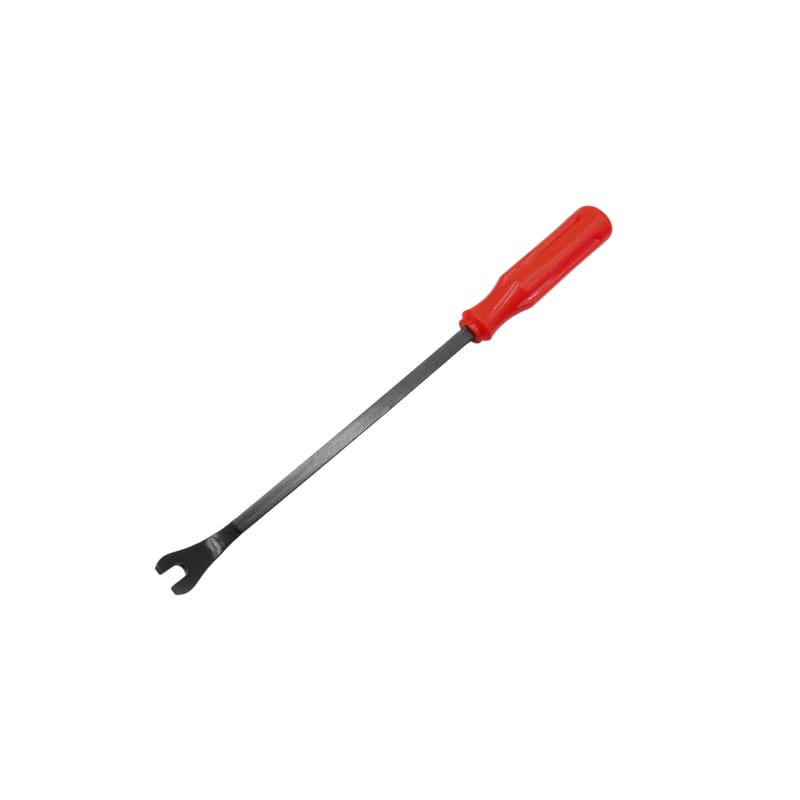
Automotive trim clip removal pliers are hand tools designed to grip, lift, or release selected automotive clips, retainers, and fasteners during vehicle disassembly.
Unlike ordinary combination pliers, dedicated trim clip pliers are intended to work close to panels and fastening points. Depending on their jaw geometry, they may help remove push retainers, trim fasteners, molding clips, upholstery attachments, and other compatible components.
Fengjie offers a multipurpose car trim panel clip cutter, puller, fastener, and rivet remover. The product page identifies applications involving door panels, moldings, window trims, clips, fasteners, emblems, panels, and radios, and specifies 55 steel as the material.
For workshops, the main benefit is controlled fastener removal. For distributors, the product can support a wider automotive trim and interior repair tool category.
The important distinction is that automotive trim clip removal pliers are not universal tools for every clip. Jaw shape, opening width, access angle, and the fastener’s retention design determine whether a particular tool is suitable.
Why Automotive Trim Clips Are Difficult to Remove
Automotive clips are designed to hold panels securely while accommodating vehicle vibration, repeated use, and sometimes limited movement between connected components. Their compact design can make them difficult to release without damaging the clip or the panel.
Several factors create removal challenges.
Hidden Retaining Points
Many fasteners are concealed behind door panels, dashboard trim, wheel-arch liners, interior covers, and decorative moldings. A technician may see the panel edge but not the exact location or orientation of the clip.
Applying force away from the retaining point can bend the panel instead of releasing the fastener.
Brittle or Aged Plastic
Plastic fasteners may become less flexible after prolonged exposure to heat, cold, ultraviolet radiation, and aging. A clip that could previously be removed and reused may break during disassembly.
This is especially relevant when servicing older vehicles or trim that has already been removed several times.
Limited Working Space
Door cavities and dashboard assemblies often provide little room for a conventional pair of pliers. A tool with a bulky head may not reach the fastener without contacting surrounding components.
Incorrect Leverage
A screwdriver can concentrate force on a narrow point. If the tip slips, it may scratch the panel or break the fastener head.
Properly matched automotive trim clip removal pliers can provide a more controlled contact point, but they still require the correct access angle and release method.
How Automotive Trim Clip Removal Pliers Work
The tool’s jaws engage a compatible part of the fastener or retaining assembly. The technician then applies controlled force to release the clip from its mounting hole or panel.
The precise movement depends on the fastener design.
For example, a push-type retainer may need to be lifted from beneath its head. A clip with a locking tab may require the tab to be depressed before extraction. A screw-type plastic retainer may need to be turned before the remaining body can be removed.
The general principle is to transfer force to the fastener rather than bending the surrounding panel.
A safe removal sequence follows four stages:
- Identify the fastener and how it locks.
- Select a tool with compatible jaw geometry.
- Position the tool close to the retaining point.
- Apply gradual force in the intended release direction.
If the clip does not move, stop and reassess the fastener. Increasing force without understanding the retention mechanism can damage both the clip and the panel.
Which Automotive Repair Jobs Use Trim Clip Removal Pliers?
1. Door Panel Removal
Door panels commonly use plastic push clips, retaining fasteners, and screws. Before removing the panel, technicians may need to release hidden fasteners around its perimeter.
Automotive trim clip removal pliers can help with compatible fasteners that are difficult to access using a standard forked remover.
The technician should first remove visible screws and covers, then identify the clip locations. Pulling the panel away before releasing every attachment can crack the panel or damage its mounting points.
For broader door repair applications, see the Car Door Panel Removal Tool Guide.
2. Window Trim and Molding Removal
Window trim can use clips that hold decorative strips against the door frame or window opening. Some fasteners release by lifting, while others need a specific direction of movement.
The correct pliers may assist with accessible retaining clips, but they should not automatically be used to pry directly against painted metal or glass.
For delicate exterior trim, a suitable plastic wedge or dedicated molding remover may be the safer starting point.
3. Interior Upholstery and Carpet Repairs
Interior upholstery panels, luggage-area covers, and carpet retainers may use push clips or other plastic fasteners.
During removal, keep the tool aligned with the fastener instead of twisting the panel to create additional leverage.
If a retainer is designed for one-time use or shows signs of cracking, replacement may be more appropriate than attempting to reuse it.
4. Wheel-Arch Liners and Underbody Covers
Wheel-arch liners and selected underbody panels may use plastic push retainers or compatible fasteners. These components can collect dirt, moisture, and road debris, making clips harder to release.
Clean visible debris around the fastener before removal. If the retainer is damaged or heavily contaminated, determine whether it needs to be replaced.
The tool should engage the fastener directly rather than digging into the liner material.
5. Exterior Body Moldings
Decorative moldings and body-side strips may use clips, screws, adhesive, or a combination of attachment methods.
Pliers are appropriate only for fasteners that match the tool’s intended use. Adhesive-bonded moldings require a different removal approach.
Before pulling on the molding, establish whether the attachment is mechanical, adhesive, or mixed. Otherwise, a clip may release while the molding itself bends or cracks.
6. Emblems and Small Decorative Panels
Some emblems and decorative components use mechanical retainers. Others are attached primarily with adhesive tape.
Automotive trim clip removal pliers can help release compatible mechanical attachments, but they should not be used to force adhesive-bonded emblems off a painted surface.
When adhesive is involved, follow an appropriate surface-safe removal process.
7. Dashboard and Console Trim
Dashboard panels and console covers can use a mixture of clips, screws, and locking tabs.
Because visible interior surfaces are easily scratched, identify the fastener before selecting a tool. Use a non-marring trim tool for the initial separation when appropriate, then use clip pliers where the fastener design allows.
Do not force metal jaws between visible surfaces merely because the tool fits into the gap.
Automotive Trim Clip Removal Pliers vs. Forked Clip Removers
These tools overlap in purpose but are not interchangeable in every situation.
| Feature | Automotive Trim Clip Removal Pliers | Forked Clip Remover |
|---|---|---|
| Main function | Grip or release compatible fasteners | Slide beneath a compatible clip head |
| Working action | Squeezing, lifting, or controlled leverage | Levering beneath the retainer |
| Best access | Depends on jaw design and clearance | Requires room for the fork |
| Fastener visibility | May work in selected restricted positions | Usually easier when the clip head is accessible |
| Surface protection | Depends on jaw finish and positioning | Depends on fork shape and contact point |
| Best selection factor | Jaw geometry and fastener compatibility | Fork width, thickness, and tip profile |
A workshop that handles multiple vehicle types may benefit from keeping both tools available.
Pliers can be useful when the fastener’s shape and access permit a controlled grip. A forked remover can be more appropriate when the tool needs to slide beneath the clip head.
Neither tool should be selected solely because it is stronger. The objective is to release the fastener while minimizing damage to the component being serviced.
How to Remove Stubborn Automotive Trim Clips Safely
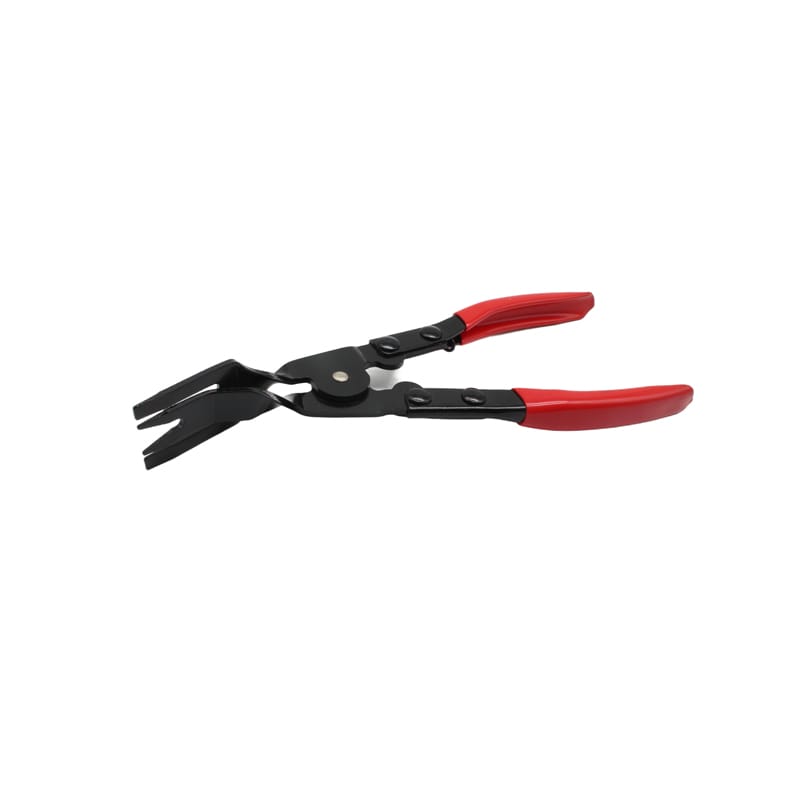
Step 1: Identify the Fastener Type
Determine whether the fastener is a push retainer, screw-type clip, spring clip, locking-tab attachment, or another design.
If the fastener has a central pin, check whether the pin must be raised or depressed before the outer body can be removed.
Step 2: Inspect the Surrounding Panel
Check for cracks, previous repairs, deformation, and limited clearance.
If the panel is already damaged, reduce the applied force and support the area where appropriate.
Step 3: Remove Obstructing Components
Remove visible screws, covers, and other attachments that prevent the panel from moving.
Do not assume that every resistant panel is being held by a stubborn clip. A hidden screw or locking tab may still be engaged.
Step 4: Choose the Correct Tool
Select automotive trim clip removal pliers only when their jaws can engage the fastener correctly.
If the tool cannot reach the retaining point, use a suitable alternative rather than forcing the jaws into the gap.
Step 5: Position the Jaws Close to the Fastener
The closer the contact point is to the retaining mechanism, the less unnecessary bending force is transferred to the surrounding panel.
Keep the jaws aligned and avoid placing them against delicate decorative surfaces.
Step 6: Apply Gradual Pressure
Use controlled pressure and watch for movement at the fastener.
If the panel begins to flex significantly while the clip remains stationary, stop. Recheck the tool position, hidden attachments, and release direction.
Step 7: Inspect the Removed Clip
After extraction, check whether the fastener is cracked, distorted, or missing a locking feature.
Replace damaged retainers when necessary. Reinstalling a compromised clip may lead to loose trim, rattles, or poor panel fit.
Step 8: Check the Mounting Hole
Inspect the panel opening and attachment point for damage or deformation.
A correctly removed clip should not leave an unnecessarily enlarged hole or a broken mounting tab.
Why Jaw Geometry Matters More Than Appearance
Two tools may look similar but perform differently because their jaw profiles differ.
For automotive trim clip removal pliers, buyers should evaluate the following characteristics.
Jaw Opening
The opening must accommodate the intended fastener without excessive clearance. A jaw that is too narrow may fail to engage properly, while an excessively wide jaw may contact surrounding trim.
Jaw Thickness
Thinner jaws can access narrow gaps, but the design must still provide sufficient strength for the intended task.
Thicker jaws may be more robust but can be unsuitable for confined mounting points.
Tip Profile
The working tips should match the target fastener and offer stable engagement.
Rounded, forked, offset, or specially shaped tips serve different purposes. The best geometry depends on the applications specified for the product.
Alignment
The jaws should meet or align as intended when the handles are operated. Misalignment can cause the tool to slip off the fastener.
Edge Finish
Burrs and unintended sharp edges can damage plastic fasteners or visible surfaces. The working edges should be finished consistently.
For OEM and wholesale buyers, these are practical inspection points rather than cosmetic details.
Material, Strength, and Finish: What Buyers Should Evaluate
Fengjie’s multipurpose car trim panel clip cutter, puller, fastener, and rivet remover specifies 55 steel on its product page.
Material alone, however, does not establish finished-tool performance. Heat treatment, manufacturing consistency, jaw geometry, surface finishing, and handle attachment can all influence how a tool performs.
When evaluating a sample, buyers should consider:
- Whether the jaws retain their intended shape during normal use
- Whether the working tips remain aligned
- Whether the pivot operates smoothly
- Whether the handles remain secure
- Whether the finish is consistent
- Whether burrs or sharp edges are present
- Whether repeated operation produces looseness or deformation
The appropriate strength depends on the intended fastener. A tool designed for small plastic clips should not be evaluated as though it were intended for heavy mechanical fasteners.
Likewise, a high-strength steel tool can still be unsuitable if its jaws are too thick or poorly aligned for the target application.
Common Mistakes When Using Automotive Trim Clip Removal Pliers
Forcing the Wrong Tool Into the Gap
A tool that cannot reach the fastener correctly may damage the panel before it engages the clip.
Choose another tool if the jaw profile or access angle is unsuitable.
Pulling the Panel Before Releasing Every Fastener
A partially released panel can crack around the remaining attachment points.
Check the entire panel perimeter and remove hidden screws before applying additional force.
Gripping the Panel Instead of the Clip
The force should be applied to the fastener whenever possible. Gripping a thin panel edge can distort or crack the material.
Ignoring Screw-Type Retainers
Some retainers must be rotated before removal. Pulling them directly can damage their heads or the mounting holes.
Reusing Damaged Clips
A cracked or deformed clip may not hold securely after reinstallation.
Inspect removed fasteners and replace damaged components according to the repair requirements.
Using Metal Jaws Against Painted Surfaces
Metal jaws can scratch paint if they slip or contact the bodywork.
Use appropriate surface protection and select a non-marring tool where the application requires it.
Treating Every Vehicle as Identical
Clip designs, panel construction, and access points vary by vehicle model and production year.
Vehicle-specific service information should guide the repair.
Safety and Care During Automotive Fastener Removal
Automotive trim work may involve wiring harnesses, window mechanisms, side-impact airbag components, and electrical connectors.
Before removing a panel, consult the vehicle manufacturer’s service information and follow the prescribed electrical isolation procedures where required.
Keep tools away from moving glass and regulator mechanisms. Never place fingers or tools inside a mechanism that may move unexpectedly.
When removing clips near wiring, identify the harness location first. Do not use the tool to probe blindly behind a panel.
After work is complete, verify that connectors, moisture barriers, fasteners, and trim panels have been returned to their proper positions.
Tool maintenance also matters. Clean the jaws after use, inspect the pivot and handles, and remove damaged tools from service.
For general hand-tool safety principles, consult the OSHA Hand and Power Tools guidance.
What Workshops Should Look for When Buying Clip Removal Pliers
A professional workshop should select automotive trim clip removal pliers according to the fasteners it encounters most often.
Consider these questions:
- Does the jaw shape match the clips used in the workshop’s common repair jobs?
- Can the tool access fasteners in restricted spaces?
- Are the jaws aligned correctly?
- Is the handle comfortable enough for controlled operation?
- Are the working surfaces properly finished?
- Does the pivot operate consistently?
- Can the tool be cleaned and inspected easily?
- Is a different clip remover required for other fastener types?
The right tool is the one that works reliably for the intended task, not necessarily the one with the largest head or the most aggressive leverage.
Workshops servicing many vehicle types may need a small selection of complementary tools rather than one tool expected to handle every fastener.
B2B Quality Control: How to Evaluate Samples Before Bulk Ordering
For distributors, importers, and private-label brands, sample inspection should establish whether the product matches its intended use and approved specification.
1. Visual Inspection
Check the jaws, pivot, handles, surface finish, and overall construction.
Look for cracks, deformation, corrosion, burrs, or inconsistent finishing.
2. Jaw Alignment Test
Operate the tool through its normal movement and inspect how the jaws meet.
Misalignment can affect grip and increase the chance of slipping.
3. Operation Test
Open and close the tool repeatedly. The movement should be consistent, without unexpected binding or excessive looseness.
4. Fastener Compatibility Test
Test the tool against representative fasteners specified for the product.
Include different compatible clip sizes and access conditions rather than relying on one easy demonstration.
5. Surface Damage Check
Inspect the tested clips and surrounding panels for damage caused by the tool’s contact points.
The test should reflect the intended application and normal operating method.
6. Handle and Pivot Inspection
Check whether the handles remain secure and whether the pivot develops excessive play during repeated use.
7. Batch Consistency
Compare several samples from the same production batch. Jaw profile, alignment, finish, and operation should remain consistent with the approved reference sample.
8. Packaging Inspection
Confirm that the product name, application description, barcode, logo, and packaging configuration match the purchase specification.
A clear inspection record helps distributors compare future batches and resolve quality issues more efficiently.
Building a More Complete Automotive Trim Repair Tool Range
Automotive trim clip removal pliers are most useful when positioned alongside complementary tools that support different stages of disassembly.
A practical product range can include:
Panel access tools: Plastic trim wedges and door panel removers help separate panels from clips without concentrating force on visible surfaces.
Fastener removal tools: Clip pliers, forked removers, and compatible fastener pullers address different retention mechanisms.
Molding tools: Dedicated molding removers support selected exterior trim and window molding applications.
Precision tools: Picks and hooks can help access small locking tabs and reposition compatible components.
Surface preparation tools: Suitable scrapers can help with selected residue-removal tasks when used on compatible surfaces.
Fengjie’s Car Body and Interior Tools category provides a starting point for buyers planning a broader automotive repair tool range.
The objective is to build a product family around actual workshop tasks. This helps buyers understand why each SKU exists and reduces overlap between tools that perform substantially the same job.
OEM and Private-Label Opportunities
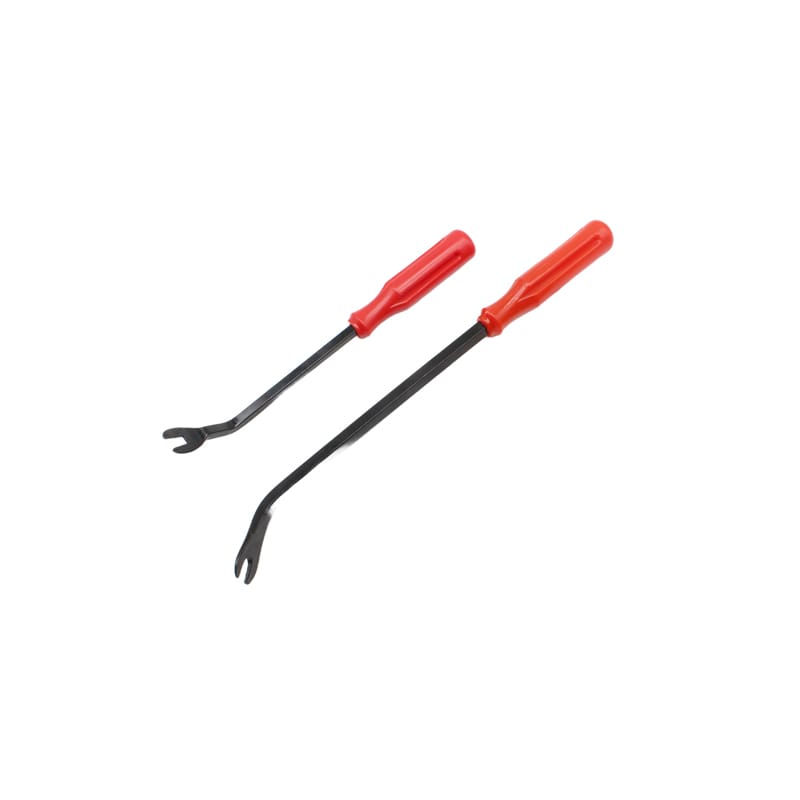
Automotive trim clip removal pliers can be considered for OEM and private-label programs when the target applications, tool specifications, and packaging requirements are clearly defined.
Potential specification areas include:
- Jaw profile and opening
- Overall tool length
- Material specification
- Surface finish
- Handle material and color
- Pivot construction
- Logo placement
- Retail packaging
- Barcode and labeling
- Instruction materials
- Set configuration
- Incoming inspection criteria
A distributor serving professional repair shops may prioritize functional consistency and durable packaging. A retail program may place greater emphasis on clear application labeling and storage.
Before approving a customized tool, buyers should define the compatible fastener types and evaluate samples against those requirements.
For product inquiries, wholesale supply, or OEM discussions, visit the Fengjie Tools contact page and provide the intended applications, target market, preferred specifications, and packaging needs.
FAQ
What are automotive trim clip removal pliers used for?
Automotive trim clip removal pliers are designed to grip, lift, or release compatible automotive clips and fasteners during panel, molding, upholstery, and interior repair work.
Are automotive trim clip removal pliers suitable for every plastic clip?
No. Clip design and access conditions vary. Some fasteners require a forked remover, a plastic trim wedge, a screwdriver, or a different release method.
Can clip removal pliers prevent all fastener damage?
No tool can guarantee damage-free removal in every situation. Correct tool selection, fastener condition, access, and technique all affect the result.
What is the difference between clip removal pliers and a trim pry tool?
Clip removal pliers engage compatible fasteners with their jaws. A trim pry tool separates panels or trim by applying controlled leverage at an edge or clip location.
What should I inspect before buying clip removal pliers in bulk?
Check jaw geometry, alignment, material, surface finish, pivot movement, handle security, compatibility with intended fasteners, packaging, and batch consistency.
Why do automotive clips break during removal?
Common causes include aging plastic, incorrect tool positioning, hidden fasteners, excessive leverage, and pulling in the wrong direction.
Can these tools be customized for private-label programs?
Depending on manufacturing capability, buyers can discuss tool specifications, handle details, branding, packaging, labeling, and kit configuration with the supplier.
How can I request automotive trim clip removal tools from Fengjie?
Use the Fengjie Tools contact page to describe your target applications, quantity requirements, preferred specifications, and packaging needs.
Conclusion
Automotive trim clip removal pliers help technicians release compatible fasteners with better control during door panel removal, window trim service, interior repairs, molding work, and selected bodywork tasks.
Their effectiveness depends on more than leverage. Jaw geometry, access clearance, alignment, surface finish, fastener condition, and correct technique all influence whether a clip can be removed without unnecessary damage.
For workshops, the best approach is to identify the fastener first, choose a compatible tool, apply force close to the retaining point, and stop when the fastener does not respond as expected.
For distributors and OEM buyers, sample evaluation should focus on practical compatibility, repeatable operation, jaw consistency, material and finish, handle security, packaging, and batch quality.
Fengjie’s multipurpose car trim panel clip cutter, puller, fastener, and rivet remover is a relevant product for buyers developing an automotive trim and fastener removal range.
To discuss wholesale supply, OEM requirements, or private-label packaging, visit the Fengjie Tools contact page with your intended applications and product specifications.