
A wiper arm puller is a small mechanical tool that solves a very specific problem: removing a wiper arm that is stuck on a tapered or splined pivot shaft without levering against the windshield, cowl, or surrounding trim. This matters during wiper-linkage service, motor replacement, cowl removal, and windshield-related repair because a seized arm can turn a simple disassembly step into a cracked cowl panel, stripped spline, damaged linkage, or chipped glass.
For workshops and distributors, the value of a wiper arm puller is not just that it “pulls harder.” A good tool applies force in a controlled line, supports the arm base correctly, keeps the forcing screw centered, and fits into the limited space between the arm, spindle, and cowl.
This guide explains how the tool works, why wiper arms seize, which puller designs suit different access conditions, how to use the tool safely, and what B2B buyers should inspect before approving a product or private-label program.
Table of Contents
What Is a Wiper Arm Puller?
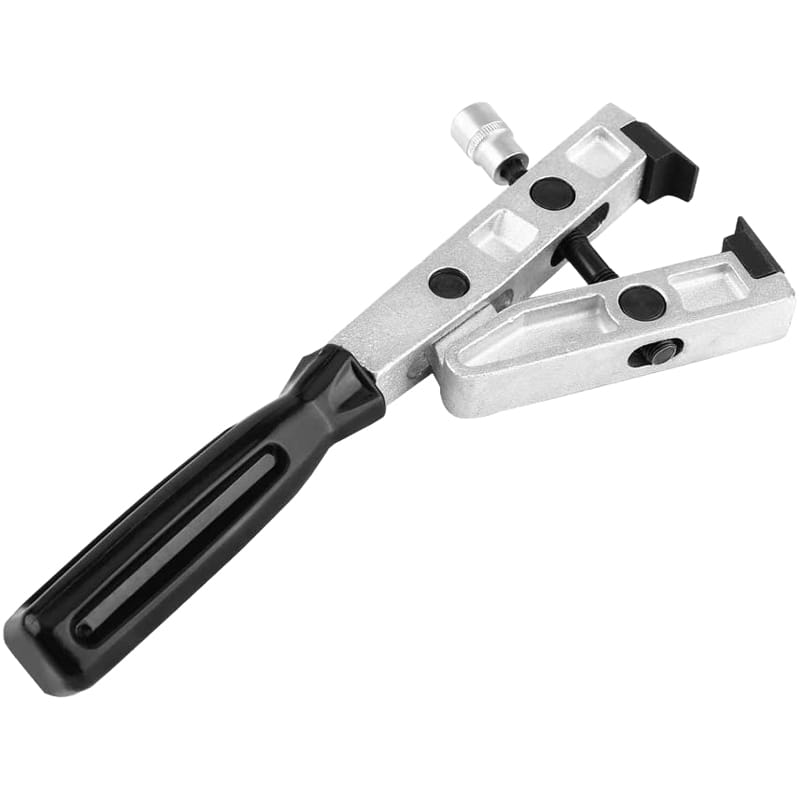
A wiper arm puller is a non-powered extraction tool designed to separate a windshield wiper arm from its mounting spindle. Most designs use a small frame or pair of jaws that fit under the arm base and a central threaded screw that pushes against the top of the spindle.
As the screw is tightened, the puller applies opposing forces:
- The jaws pull upward on the wiper arm.
- The forcing screw pushes downward on the spindle.
- The arm is separated from the tapered or splined fit without prying against nearby bodywork.
This is the main advantage of a wiper arm puller. The tool keeps the extraction force inside the arm-and-spindle assembly instead of transferring that force into the windshield or plastic cowl.
Fengjie lists a Universal Windshield Wipe Arm Puller in its automotive tool range. The product category also includes additional wiper arm puller models, giving buyers options for different puller structures and fit ranges.
Why Wiper Arms Become Difficult to Remove
A wiper arm may look as if it should slide off as soon as the retaining nut is removed. In practice, several factors can make the connection extremely tight.
Tapered or Splined Mounting
Many wiper arms are fitted over a tapered or splined spindle. The shape is intended to prevent the arm from slipping during normal operation.
When the retaining nut is tightened, the arm seats firmly onto the spindle. Over time, the fit can become even more difficult to separate.
Corrosion and Contamination
Moisture, road dirt, washer fluid residue, and environmental exposure can accumulate around the base of the arm. Corrosion products or debris can increase friction between the arm and spindle.
Long Service Time
A wiper arm that has remained in the same position for years can be much harder to remove than one that has been serviced recently.
Repeated Tightening
If the arm has been removed and reinstalled several times, the tapered or splined connection may seat tightly again after each service.
A dedicated wiper arm puller is designed to apply extraction force in the correct direction instead of transferring uncontrolled leverage into nearby components.
When a Wiper Arm Puller Is Useful
A wiper arm puller is commonly used before or during:
- Windshield replacement
- Wiper motor replacement
- Wiper linkage repair
- Cowl panel removal
- Wiper arm replacement
- Windshield molding access
- Front body repair
- Rain-tray or plenum service
- Rear wiper service
- Electrical work around the wiper system
For windshield-related work, removing the wiper arm may be necessary before the cowl panel can be removed. That cowl can block access to the lower windshield edge, molding, or adhesive area.
This makes the wiper arm puller relevant to a broader automotive glass tool range.
Fengjie’s Windshield Molding Removal Tool Guide explains how molding and cowl preparation fit into the early stages of bonded-glass removal.
A wiper arm puller supports that preparation step before adhesive cutting begins.
Why Prying the Arm Off Can Damage the Vehicle
The main reason to use a wiper arm puller is control.
A screwdriver or pry bar can create leverage, but it needs somewhere to pivot. On many vehicles, that pivot point becomes:
- The plastic cowl panel
- Painted sheet metal
- A trim edge
- The windshield itself
This can create several problems.
Cowl Damage
Plastic cowl panels can crack or deform under concentrated pry pressure.
Paint Damage
A metal pry tool can chip or scratch paint around the wiper spindle.
Windshield Damage
The windshield edge is vulnerable to concentrated impact or leverage. Even if the glass does not break immediately, striking or loading the edge creates unnecessary risk.
Linkage Damage
Rocking or hammering a seized arm can transfer force into the wiper pivot or linkage underneath.
A wiper arm puller avoids these problems by placing the extraction load between the arm base and spindle.
How a Wiper Arm Puller Creates Mechanical Advantage
The threaded forcing screw is the key component of most puller designs.
When the user turns the screw:
- Rotational input is converted into linear force.
- The screw pushes against the spindle.
- The puller frame or jaws react by lifting the arm.
- Force builds gradually rather than suddenly.
A smooth thread also affects tool quality. Rough threads increase friction, make force harder to judge, and can create a jerky tightening feel.
A well-designed wiper arm puller should allow the technician to build extraction force progressively while keeping the tool centered.
Fixed-Jaw vs. Adjustable Wiper Arm Puller Designs
Not every wiper arm has the same base diameter, spindle position, or surrounding clearance.
That is why different wiper arm puller designs exist.
Fixed-Jaw Puller
A fixed-jaw wiper arm puller uses a predetermined opening or frame.
Advantages include:
- Simple construction
- Quick setup
- Good rigidity
- Stable alignment when the fit is correct
The limitation is range. If the jaws cannot fit under the arm base or the spindle geometry is different, the tool may not be suitable.
Adjustable Puller
An adjustable wiper arm puller allows the user to change jaw spacing or working width.
This can be useful for workshops that service many vehicle types.
Important quality points include:
- Adjustment range
- Jaw symmetry
- Locking stability
- Thread quality
- Frame rigidity
An adjustable tool is useful only if the jaws remain aligned under load.
Bridge-Style or Compact Puller
Compact pullers are useful where space around the arm base is limited.
They may fit better near:
- Deep cowl recesses
- Rear wiper assemblies
- Closely positioned washer nozzles
- Narrow spindle openings
The correct structure depends on the actual application range rather than on which design looks stronger.
How to Choose the Right Wiper Arm Puller
A buyer should evaluate fit before strength.
Jaw Opening
The jaws must fit under the arm base.
If they are too thick, they may not enter the available gap. If they are too wide, they may contact surrounding trim instead of the arm.
Jaw Thickness
Thin jaws improve access but need enough strength to resist bending.
This balance is especially important on compact pullers.
Forcing-Screw Position
The screw should contact the spindle as close to the center as possible.
Poor centering can make the wiper arm puller tilt under load.
Working Height
Some arms sit high above the spindle. Others are recessed close to the cowl.
The puller must have enough internal height to bridge the assembly without contacting nearby bodywork.
Handle or Drive Style
A wiper arm puller may use:
- Hand knob
- T-handle
- Hex drive
- Combination design
The best choice depends on expected extraction force and available clearance.
A hand knob can be quick for lighter work. A hex-drive screw can provide better controlled torque when more force is required.
Step-by-Step: How to Use a Wiper Arm Puller
Always follow vehicle-specific service information where available.
1. Park the Wipers Correctly
Make sure the wipers are in their normal parked position before removing power or beginning disassembly.
Marking the blade position on the windshield with removable tape can help during reinstallation.
2. Protect the Work Area
Protect the windshield and cowl from dropped tools or accidental contact.
The goal is to prevent a simple wiper-arm job from creating cosmetic or glass damage.
3. Remove the Protective Cap
Many wiper arms have a plastic cap covering the retaining nut.
Use a suitable trim tool rather than forcing a sharp metal edge against the cap.
4. Remove or Loosen the Retaining Nut
Use the correct socket or wrench.
On some applications, technicians may leave the nut threaded on a small amount while breaking the arm free so the arm cannot release suddenly. Follow the vehicle-specific procedure.
5. Position the Wiper Arm Puller
Place the jaws or support surfaces under the arm base.
Confirm that:
- Both sides are seated securely.
- The puller is not resting on the cowl.
- The forcing screw is centered on the spindle.
- The tool is not contacting the windshield.
- Washer nozzles or nearby trim are clear.
6. Tighten the Forcing Screw Gradually
Turn the screw smoothly.
Do not rush.
Watch the wiper arm puller alignment as load increases.
7. Stop if the Tool Tilts
If the wiper arm puller moves off-center, stop and reset the jaws.
Continuing to tighten a misaligned puller increases the chance of slipping or damaging the arm.
8. Release the Arm
When the tapered or splined fit breaks free, the arm may move suddenly.
Support it with the other hand.
9. Remove the Puller and Arm
Once the joint has released, remove the tool and lift the arm from the spindle according to the service procedure.
10. Inspect the Spindle and Arm
Before reinstallation, check:
- Spline condition
- Corrosion
- Debris
- Cracks around the arm base
- Damaged threads
- Washer-nozzle routing where applicable
Do not reinstall a visibly damaged component without proper evaluation.
Wiper Arm Puller Use Before Windshield Removal
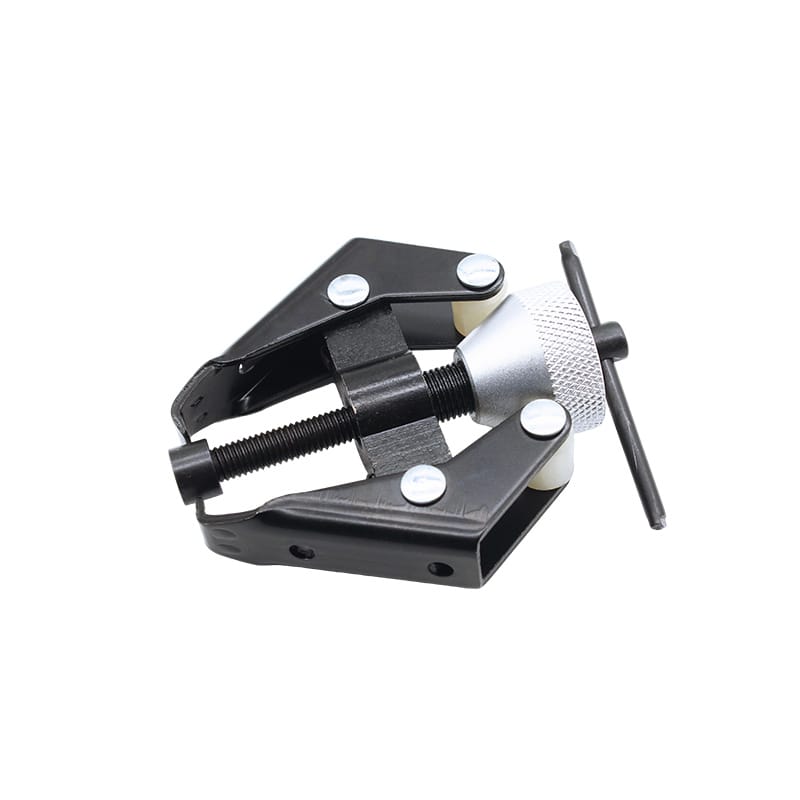
The wiper arm puller has a direct role in professional auto-glass preparation.
A typical windshield-removal sequence may include:
- Inspecting the vehicle.
- Marking component positions.
- Removing wiper arms.
- Removing or releasing the cowl panel.
- Removing windshield molding.
- Protecting paint, dashboard, and trim.
- Accessing the adhesive bead.
- Cutting the urethane.
- Handling and removing the glass.
- Preparing the bonding surface.
The wiper arm puller supports step three.
Without clean arm removal, technicians may struggle to remove the cowl safely or reach the lower windshield edge.
For the later cutting stage, see Fengjie’s Windshield Removal Tool Guide, which explains different bonded-glass removal methods.
These tools serve different functions.
The wiper arm puller clears access. The glass-removal system separates the bonded windshield.
Front vs. Rear Wiper Arm Removal
Front and rear wiper arms can present different access problems.
Front Wiper Arms
Front arms are often located near the cowl and windshield base.
The main concerns are:
- Cowl clearance
- Windshield-edge protection
- Arm alignment
- Washer components
- Tight spindle fit
A compact wiper arm puller can be helpful where the cowl leaves limited room.
Rear Wiper Arms
Rear wipers may be mounted on a hatch, liftgate, or rear-glass area.
Access can be even tighter, and trim components may be closer to the spindle.
A smaller wiper arm puller or different jaw geometry may therefore be required.
Common Mistakes When Using a Wiper Arm Puller
1. Forgetting to Mark the Park Position
The arm may be reinstalled at the wrong angle, causing poor wipe coverage or contact with surrounding trim.
2. Pulling Before Removing the Retaining Nut
The wiper arm puller cannot release an arm that is still mechanically clamped in place.
3. Placing the Jaws on the Plastic Cowl
The puller should support the arm base, not use the cowl as a load-bearing surface.
4. Misaligning the Forcing Screw
An off-center screw can make the wiper arm puller tilt and slip.
5. Applying Maximum Force Immediately
Progressive tightening gives the technician time to detect misalignment.
6. Using an Oversized Puller in a Tight Area
A large frame may interfere with the windshield, hood, cowl, or washer components.
7. Using a Damaged Tool
Bent jaws, damaged threads, or a cracked frame reduce control.
8. Failing to Inspect the Spindle After Removal
Corrosion, damaged splines, or thread problems should be identified before reassembly.
Tool Safety and Ergonomics
A wiper arm puller is a manual tool, but it can generate significant force through its screw mechanism.
The NIOSH Guide to Selecting Non-Powered Hand Tools recommends selecting hand tools with attention to required force, repeated movement, grip, and working posture.
For a wiper arm puller, buyers should consider:
- Knob or handle size
- Screw friction
- Tool balance
- Access angle
- Grip clearance
- Whether a wrench is required
- Whether the user can keep the wrist in a stable position
A forcing screw with rough threads can make the tool much harder to operate than necessary.
The tool should also be kept in safe condition. OSHA’s Hand and Power Tools guidance emphasizes safe condition and proper use of hand tools.
Before use, inspect:
- Frame
- Jaws
- Screw threads
- Pressure tip
- Handle or knob
- Surface finish
Remove damaged tools from service.
Why Wiper-System Reassembly Matters
A wiper arm puller only handles removal. Correct reinstallation remains essential.
The National Highway Traffic Safety Administration’s information on FMVSS No. 104 explains that windshield wiping systems are subject to requirements intended to provide windshield-clearing performance.
After service, technicians should verify:
- Correct arm position
- Proper fastener installation
- Normal parked position
- Clear movement through the wiping arc
- No contact with cowl, trim, or adjacent arm
- Correct blade contact with the glass
- Washer operation where applicable
Torque and alignment requirements should follow the vehicle manufacturer’s service information.
What B2B Buyers Should Inspect Before Ordering a Wiper Arm Puller
A wiper arm puller is mechanically simple, but poor dimensional control can make it difficult to use.
Frame Material and Rigidity
The body must resist spreading under normal extraction load.
Buyers should verify the stated material and test the finished component rather than relying only on generic “heavy duty” claims.
Jaw Geometry
Measure:
- Jaw thickness
- Jaw opening
- Hook depth
- Working width
- Symmetry
These dimensions determine whether the wiper arm puller can fit under different arm bases.
Forcing Screw
Inspect:
- Thread pitch
- Thread finish
- Straightness
- Screw hardness
- Tip geometry
- Drive size
- Surface treatment
The screw should turn smoothly under load.
Pressure Tip
The tip that contacts the spindle should remain centered and resist deformation.
A rotating or shaped pressure tip may improve contact depending on the design.
Surface Finish
Inspect for:
- Burrs
- Sharp unintended edges
- Coating defects
- Corrosion-prone areas
- Rough thread finish
Handle or Knob
A hand-tightened wiper arm puller should provide enough grip area for practical use.
If a wrench-driven design is intended, the drive geometry should be consistent and accessible.
A Practical Wiper Arm Puller Sample Test Plan
B2B buyers should test sample tools on representative wiper assemblies.
| Test Area | What to Check | Why It Matters |
|---|---|---|
| Jaw access | Puller fits under several arm bases | Confirms application range |
| Screw alignment | Screw stays centered on spindle | Reduces slipping |
| Frame rigidity | Body does not spread abnormally | Supports controlled extraction |
| Thread feel | Screw turns smoothly under load | Improves control |
| Release test | Arm separates without cowl leverage | Confirms core function |
| Jaw recovery | Jaws remain aligned after cycles | Indicates durability |
| Surface finish | No harmful burrs or coating failures | Improves handling |
| Batch dimensions | Multiple samples remain consistent | Supports repeat orders |
| Packaging | Puller is protected during transport | Reduces shipment damage |
A wiper arm puller should not be approved only because one easy arm was removed successfully.
Include tight and limited-clearance examples that reflect the intended customer base.
OEM and Private-Label Opportunities
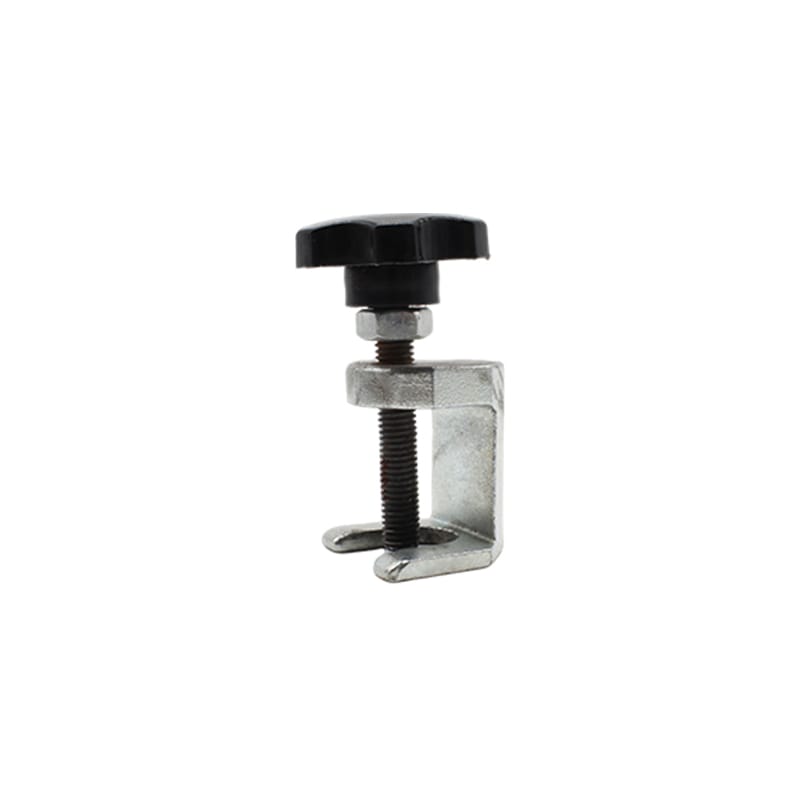
A wiper arm puller can work as a standalone SKU or as part of a broader windshield-service tool category.
Compact Universal Puller
Designed for common passenger-car applications and retail sales.
Adjustable Wiper Arm Puller
Offers a wider fit range for professional workshops.
Front and Rear Wiper Puller Set
Combines multiple sizes or geometries for broader service coverage.
Windshield Preparation Tool Range
The wiper arm puller can be sold alongside:
- Cowl and trim tools
- Windshield molding removers
- Clip tools
- Windshield removal knives
- Other automotive glass preparation tools
For OEM and private-label projects, buyers may specify:
- Puller size
- Jaw geometry
- Screw length
- Drive style
- Surface finish
- Handle or knob style
- Logo
- Packaging
- Instructions
- Barcode
- Storage case
- Set configuration
The best project starts with the application range.
Instead of asking for a generic “universal puller,” define whether the product is intended for passenger-car front wipers, rear wipers, workshop use, mobile glass technicians, or a mixed automotive service market.
Buyers can contact Fengjie Tools to discuss wiper arm puller configurations, wholesale supply, OEM packaging, and private-label requirements.
FAQ
What is a wiper arm puller used for?
A wiper arm puller removes a windshield or rear wiper arm from a tapered or splined mounting shaft by applying controlled extraction force between the arm and spindle.
Do I always need a wiper arm puller?
Not every arm is seized. Some can be removed after the retaining nut is released. A wiper arm puller becomes especially useful when the arm is tight, corroded, or difficult to remove without prying.
Can a wiper arm puller damage the windshield?
The tool is intended to reduce the need to pry against the windshield or cowl. Damage is still possible if the puller is misaligned, dropped, oversized for the area, or used incorrectly.
Why is my wiper arm stuck after the nut is removed?
The arm may be tightly seated on a tapered or splined spindle, or corrosion and contamination may increase friction at the joint.
Can I use a battery-terminal puller as a wiper arm puller?
Some puller designs may look similar, but fit and clearance are critical. Use a tool designed and sized for the intended wiper-arm application rather than assuming every small puller is interchangeable.
What should distributors check before ordering?
Inspect jaw geometry, frame rigidity, forcing-screw quality, pressure-tip alignment, surface finish, application range, packaging, and batch consistency.
Can wiper arm pullers be customized?
Depending on manufacturing capability, OEM options may include tool dimensions, jaw geometry, finish, handle style, logo, packaging, storage, and multi-piece set configurations.
Conclusion
A wiper arm puller is a compact tool with an important role in windshield, cowl, and wiper-system service. Its main advantage is not simply extra pulling power. It creates a controlled force path between the wiper arm and spindle, reducing the need to pry against plastic cowl panels, painted surfaces, or the windshield.
For technicians, the best results come from marking the parked position, removing the retaining hardware correctly, centering the puller, tightening the forcing screw progressively, and inspecting the spindle after removal.
For workshops, fit range and access matter as much as tool strength. Front and rear wipers, recessed arms, washer-nozzle designs, and tight cowl areas may require different puller geometries.
For distributors and private-label buyers, the most important sourcing factors include frame rigidity, jaw dimensions, screw quality, pressure-tip alignment, surface finish, ergonomics, and batch consistency.
Fengjie lists a Universal Windshield Wipe Arm Puller together with other wiper arm puller products in its automotive tool range.
Buyers can also review the Windshield Molding Removal Tool Guide and Windshield Removal Tool Guide to build a more complete windshield-service tool category.
For wholesale, OEM, private-label packaging, or customized automotive glass preparation tools, contact Fengjie Tools.